23 Simple Christmas Nails
You can create stunning Christmas nail art using simple techniques like classic red and gold glitter combinations, emerald green with silver accents, or candy cane striped patterns. Try winter white snowflakes, rose gold Christmas trees, or cranberry and gold foil designs for elegant holiday looks.
Add textured finishes like red velvet matte or incorporate twinkling light dots for sparkle. These festive designs require only basic materials and beginner-friendly methods to achieve professional-looking results that’ll inspire your complete holiday manicure transformation.
Classic Red and Gold Glitter
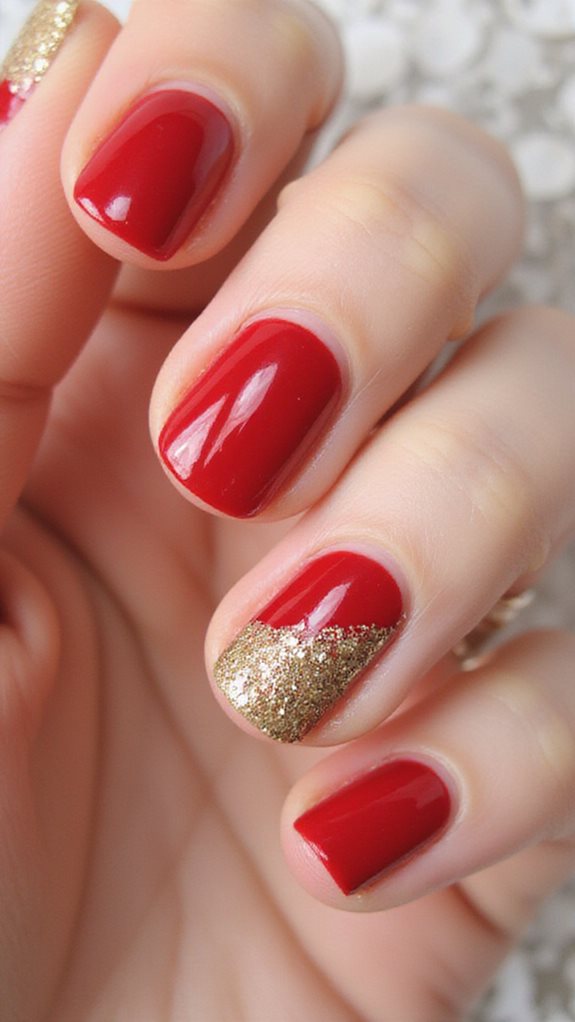
Classic red and gold glitter offers the perfect combination for sophisticated holiday nail art. This timeless color pairing creates an elegant foundation that works beautifully for any Christmas celebration. The rich crimson base provides depth while gold accents add luxurious sparkle.
Apply the deep red polish in two coats for complete opacity, then add gold glitter while the base remains slightly tacky. Focus the glitter on nail tips for an ombré effect or distribute evenly for full coverage. A high-quality topcoat seals the design and amplifies the metallic shine for professional-looking results.
Emerald Green With Silver Accents

Emerald green with silver accents creates a sophisticated alternative to traditional holiday nail designs. The deep jewel tone paired with metallic details delivers modern elegance perfect for festive occasions. This color combination photographs beautifully and works for both casual gatherings and formal celebrations.
Apply two thin coats of emerald polish for rich coverage, then add silver accents using striping tape or fine brushes. Geometric patterns like diagonal lines or delicate dots along the cuticle create contemporary appeal. Seal the design with a high-quality top coat for enhanced durability and shine.
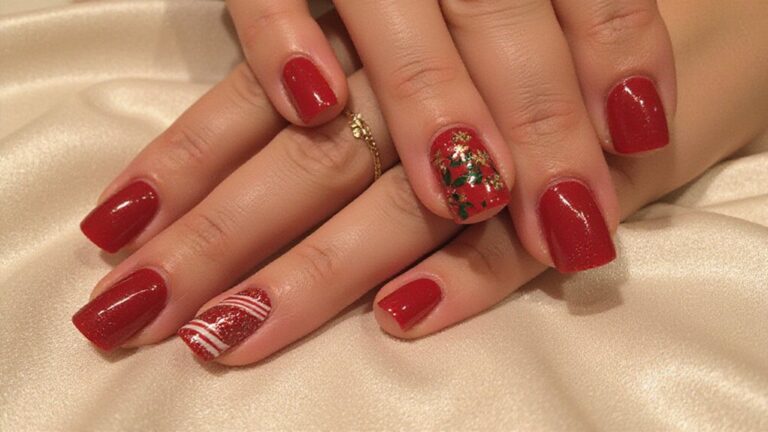
Candy Cane Striped Nails
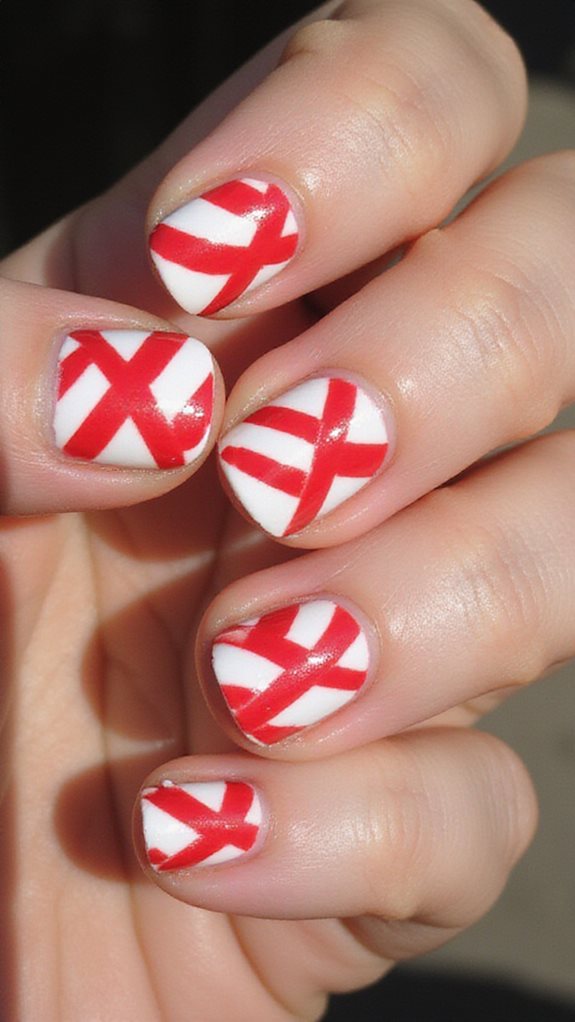
Candy cane striped nails capture the festive essence of Christmas with their classic red and white diagonal pattern. Start with a white base coat, then use striping tape or fine brushes to create precise red stripes across each nail. Work on one nail at a time to ensure consistent spacing and clean lines.
Create accent nails on your ring fingers while keeping other nails solid colored for a balanced, modern look. This versatile design suits both casual holiday gatherings and formal Christmas events. Apply a quality top coat to protect the design and maintain the vibrant color contrast throughout the season.
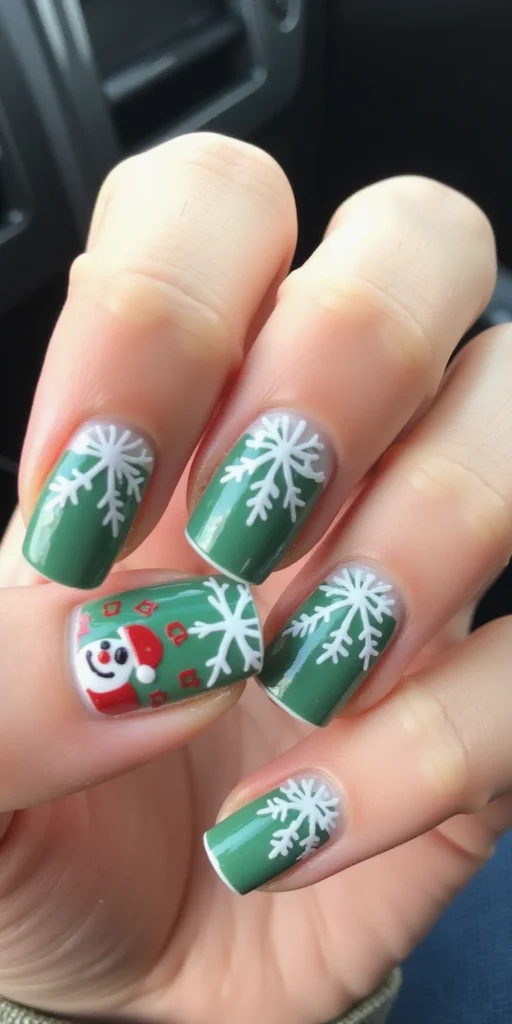
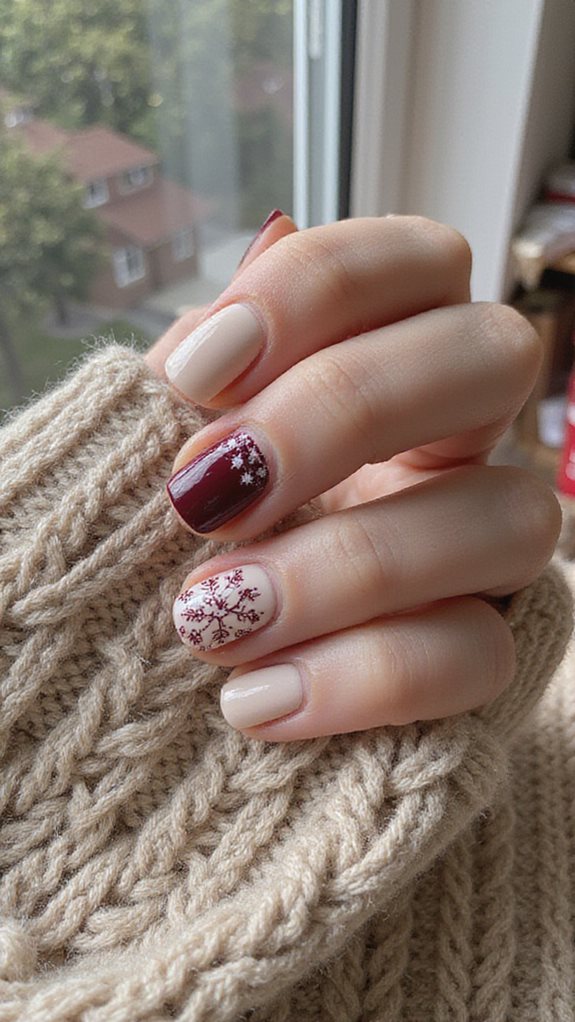
Winter White Snowflakes
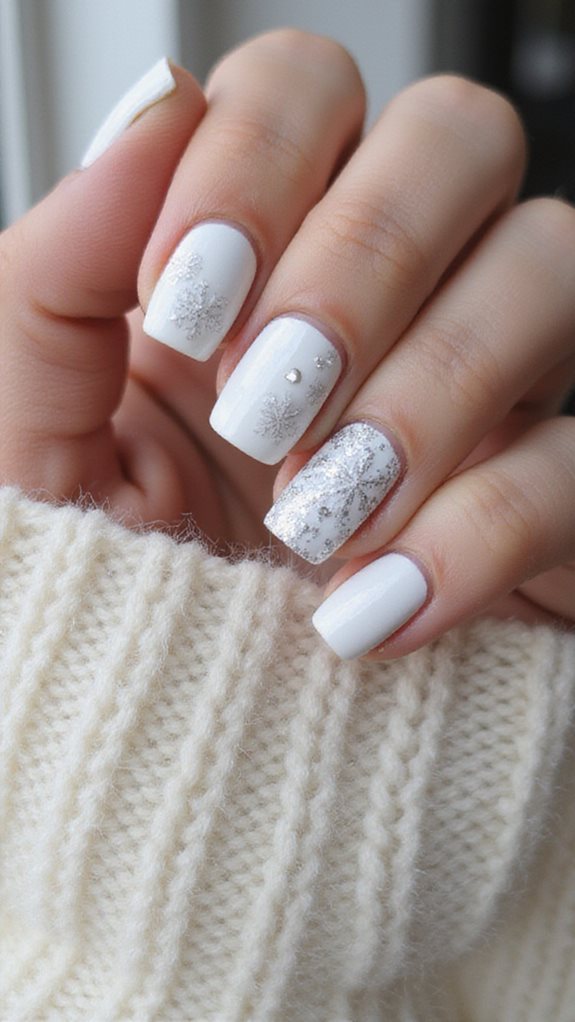
White snowflake designs transform nails into elegant winter masterpieces that capture the beauty of fresh snowfall. Start with a frosty white base coat, then use a fine detail brush to create delicate snowflake patterns with silver or pearl polish. For added dimension, incorporate glittery accents using white or iridescent glitter polish.
Create visual interest by varying snowflake sizes across your nails—place larger designs on accent nails while scattering smaller flakes on others. Draw precise six-pointed stars with thin intersecting lines, adding small dots at each endpoint for authentic snowflake geometry. Finish with a high-gloss topcoat to protect the intricate details and enhance the winter sparkle effect.
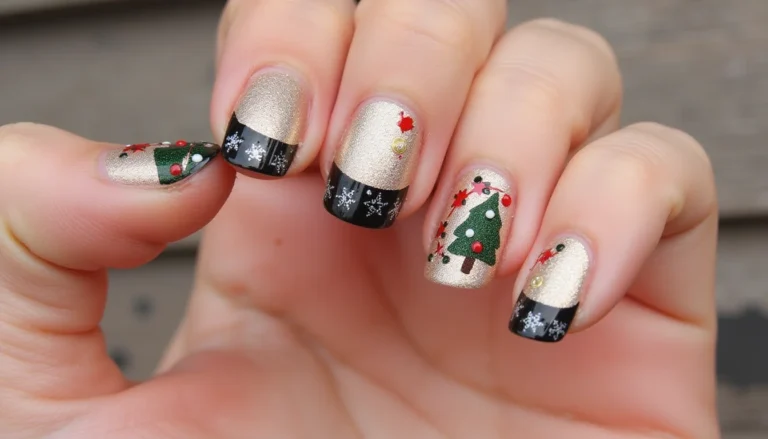
Rose Gold Christmas Trees
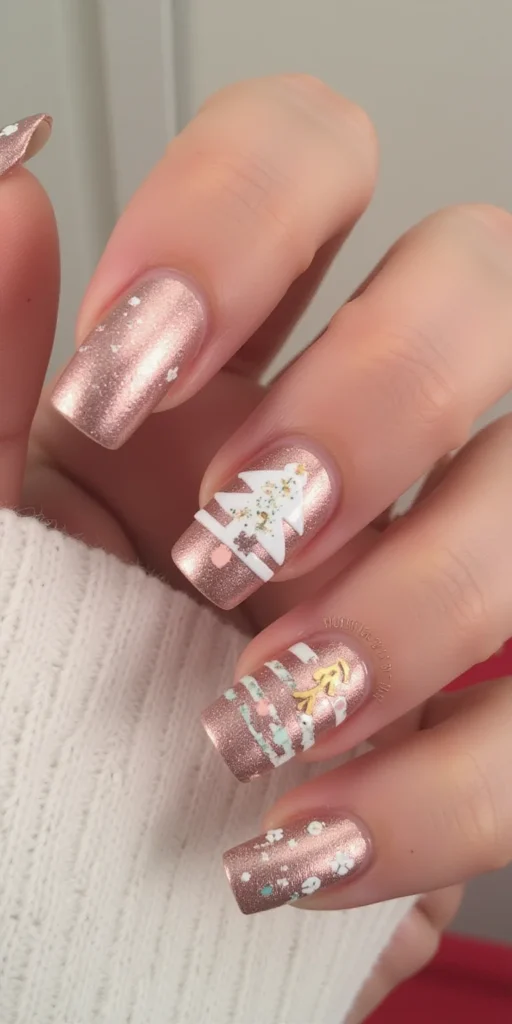
Rose gold Christmas trees bring sophisticated warmth to holiday manicures with their luxurious metallic finish and festive charm. These elegant designs use rose gold foil, metallic polish, or nail art pens on neutral base colors like nude, cream, or soft pink. The metallic elements create stunning contrast against subtle backgrounds.
Apply your base coat and foundation shade before sketching triangular tree shapes with rose gold nail art pens, building layers from bottom to top. Add texture with small diagonal strokes mimicking pine branches, then use a fine brush for realistic branch details. Complete the design with rose gold mistletoe accents near the tree tops and seal with top coat for lasting shine.
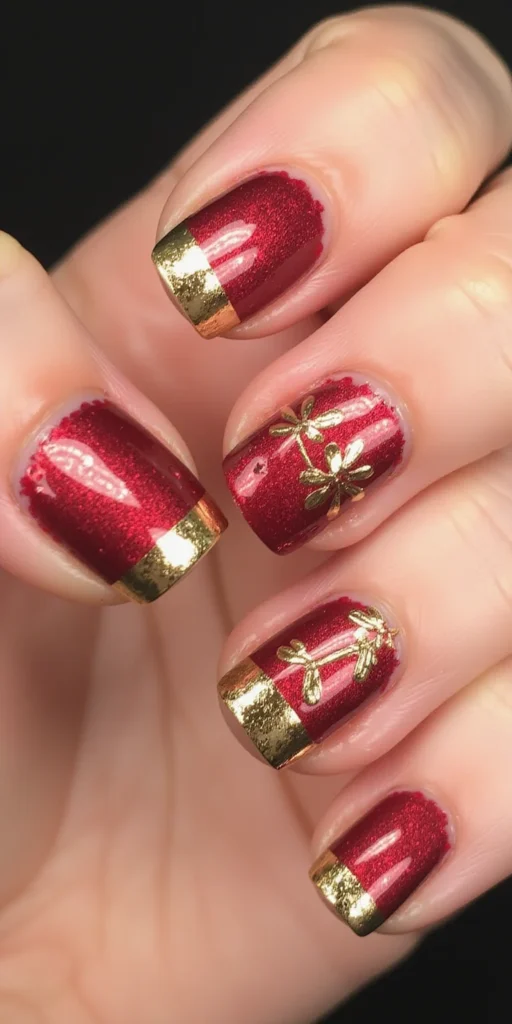
Deep Burgundy With Gold Tips
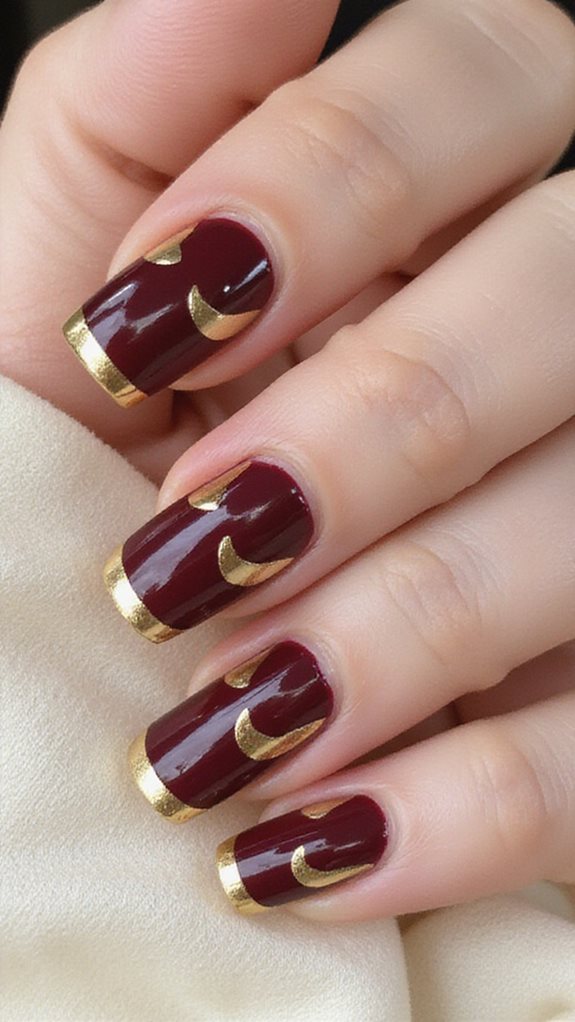
Deep burgundy with gold tips creates a sophisticated holiday manicure that perfectly balances rich wine-inspired elegance with luxurious metallic accents. Start with two coats of deep burgundy polish for complete opacity, then apply a narrow 2-3mm band of gold polish to the tips using steady horizontal strokes. The refined metallic finish adds visual interest while maintaining the base color’s dominance.
For added festive dimension, layer gold glitter polish over the metallic tips to create stunning shimmer that catches light beautifully. Seal the entire design with a high-quality top coat, focusing on tip edges where colors meet to prevent chipping. This technique maintains the crisp color distinction that makes the design so visually striking.
Festive Plaid Pattern
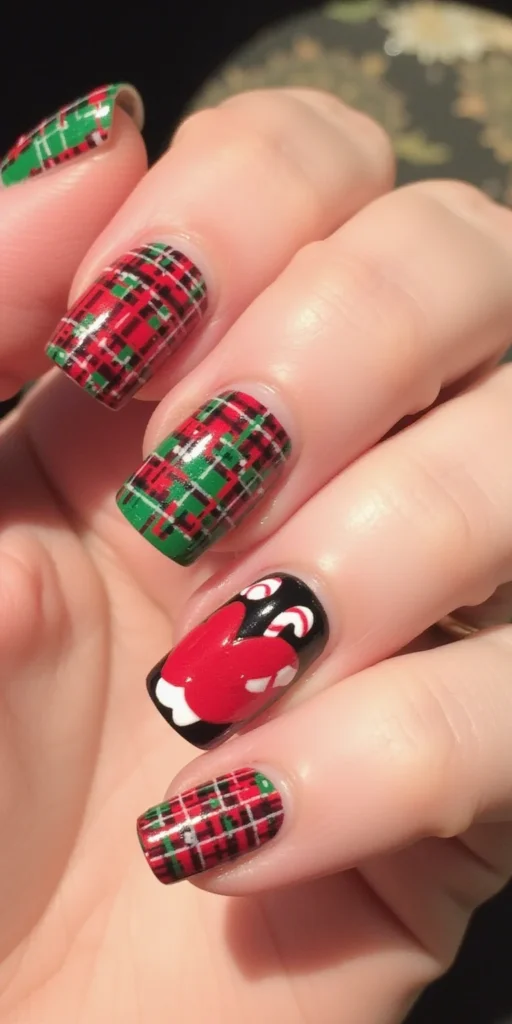
Plaid patterns create cozy winter charm for holiday nail art through intersecting lines and traditional color combinations. Start with a base color, then layer thin vertical stripes using a striping brush or tape. Once dry, add horizontal lines in complementary shades, varying thickness for visual interest.
Traditional Christmas plaids feature deep red, forest green, and gold combinations that capture authentic tartan texture. Strategic color placement anchors the design with darker hues while metallics add festive sparkle. Modern variations using navy and silver or burgundy and cream offer sophisticated holiday elegance.
Sparkling Silver Ombré

Silver ombré creates stunning gradient effects that transition seamlessly from clear to metallic brilliance. This technique works perfectly for elegant holiday celebrations and sophisticated nail art designs. The smooth blending from transparent to opulent metallic silver adds depth and visual interest.
Start with a clear base coat, then apply your lightest silver shade at the nail tips using a damp makeup sponge in gentle dabbing motions. Strategic glitter placement at the tips, gradually decreasing toward the cuticles, elevates the overall design. Seal with two thin topcoat layers to maintain the gradient’s smooth transition and create lasting brilliance.
Holly and Berries Design
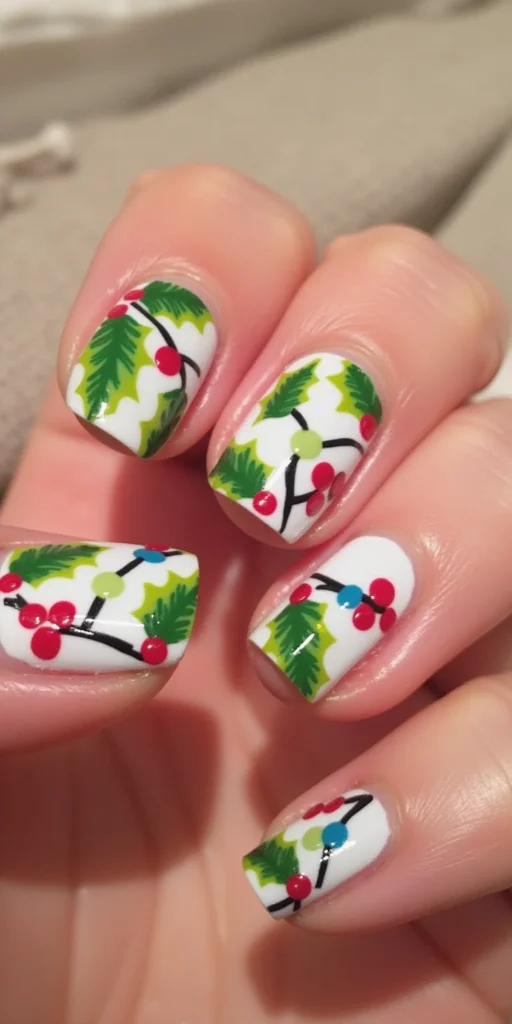
Holly and berries designs create a timeless Christmas manicure using the classic red and green color palette. Start with a nude or clear base coat, then paint small holly leaves in deep forest green using a fine brush. Create serrated edges with tiny zigzag strokes and add lighter green highlights down the center vein for dimension.
Complete the festive look by dotting small red circles for berries using a dotting tool or brush tip. Apply two coats for rich opacity and add tiny white highlights to create realistic shine. Finish with a clear topcoat to protect the artwork and enhance the glossy berry effect.
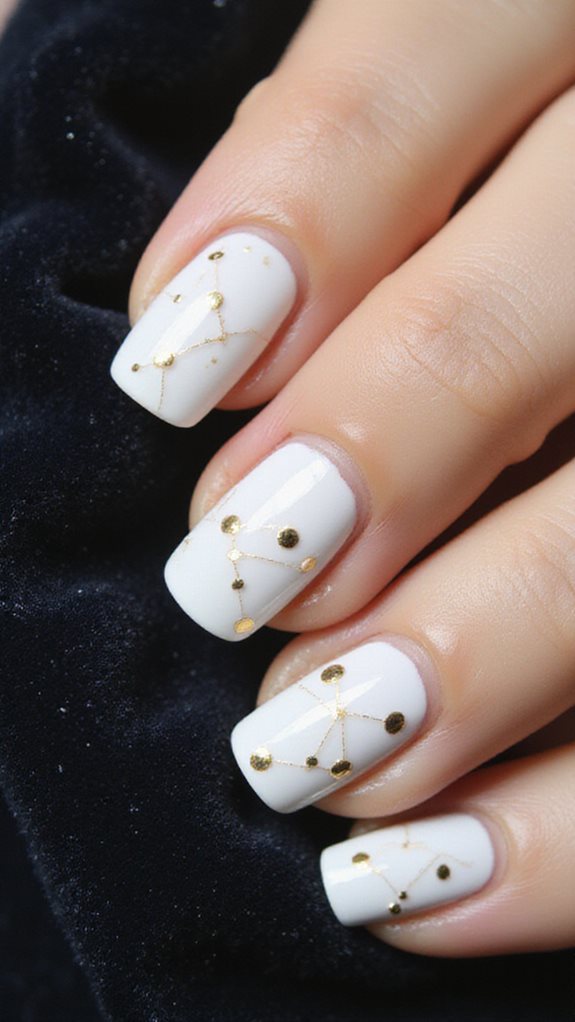
Midnight Blue With Stars
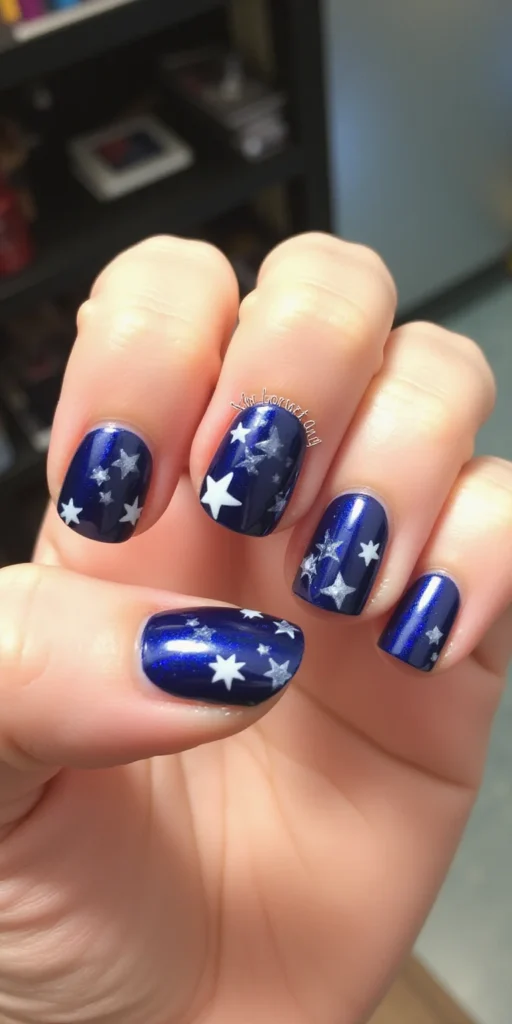
Midnight blue nails with stars create a sophisticated winter night sky effect that serves as an elegant alternative to traditional holiday colors. Begin with a midnight navy base coat, applying two thin layers for complete coverage.
Once dry, use star stencils positioned randomly across each nail to mimic natural constellation patterns. Create the stars by dabbing silver or white polish through stencil openings with a makeup sponge, removing stencils immediately while polish is still wet. Add tiny dots of glitter polish to represent distant stars for extra dimension. Complete the celestial look with a glossy top coat that seals the design and enhances the night sky effect.
Copper and Cream Combination
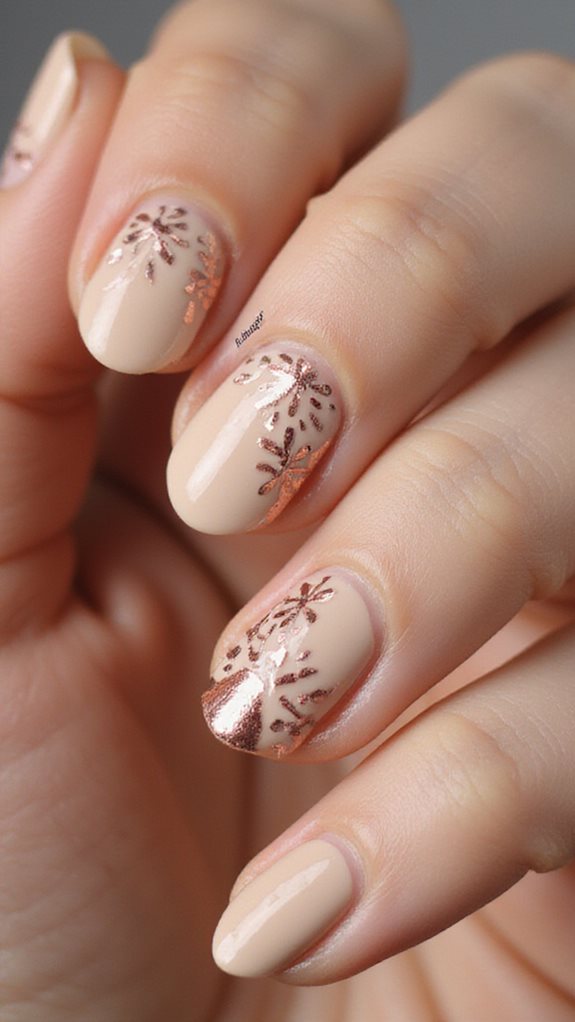
Copper and cream combinations create a sophisticated nail art palette that bridges the warmth of autumn with winter’s refined elegance. This pairing offers visual depth through contrasting textures, with shimmering metallic copper providing boldness while creamy neutrals add softness. The result is a versatile look that works for both casual and formal occasions.
Advanced applications include geometric patterns alternating between the two shades or seamless ombre effects that blend copper into cream. Proper application requires a quality base coat followed by two thin layers of each polish. A glossy topcoat enhances the metallic shimmer while extending the manicure’s durability.
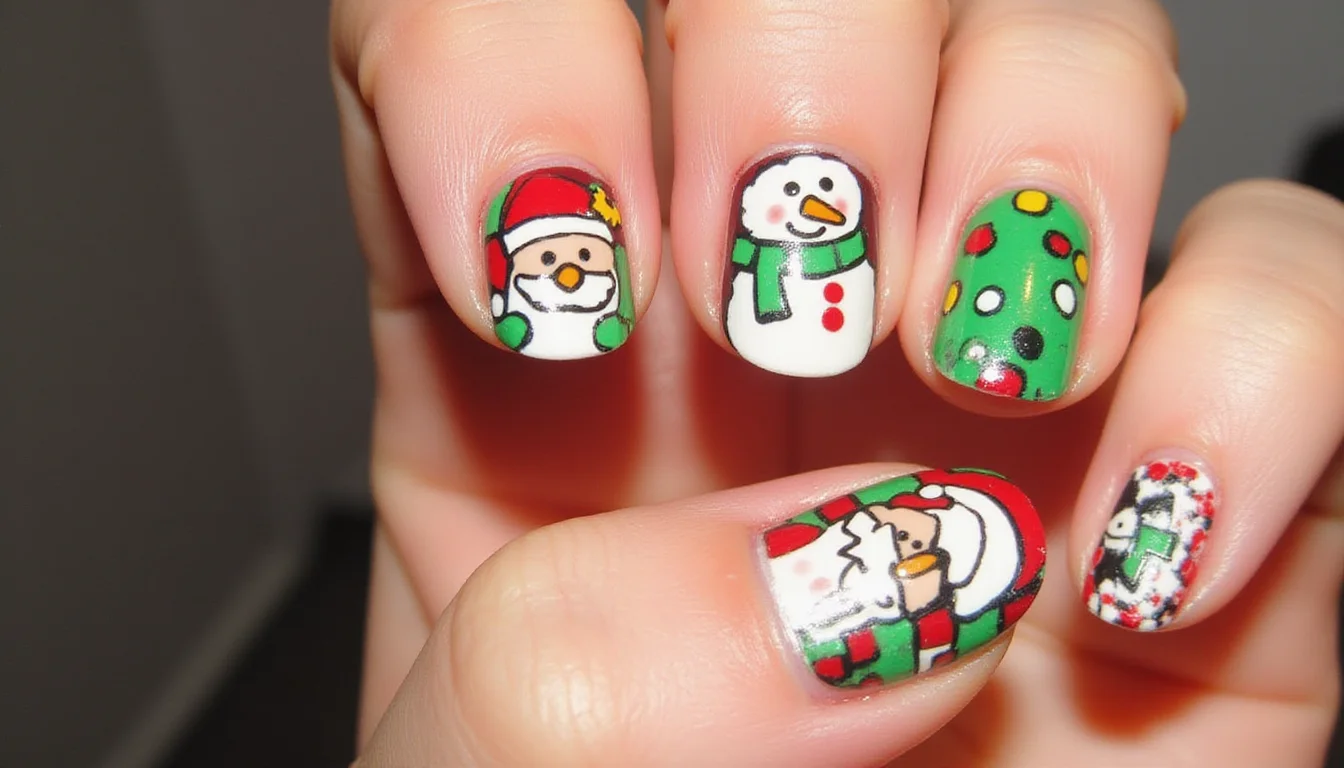
Simple Santa Hat Nails
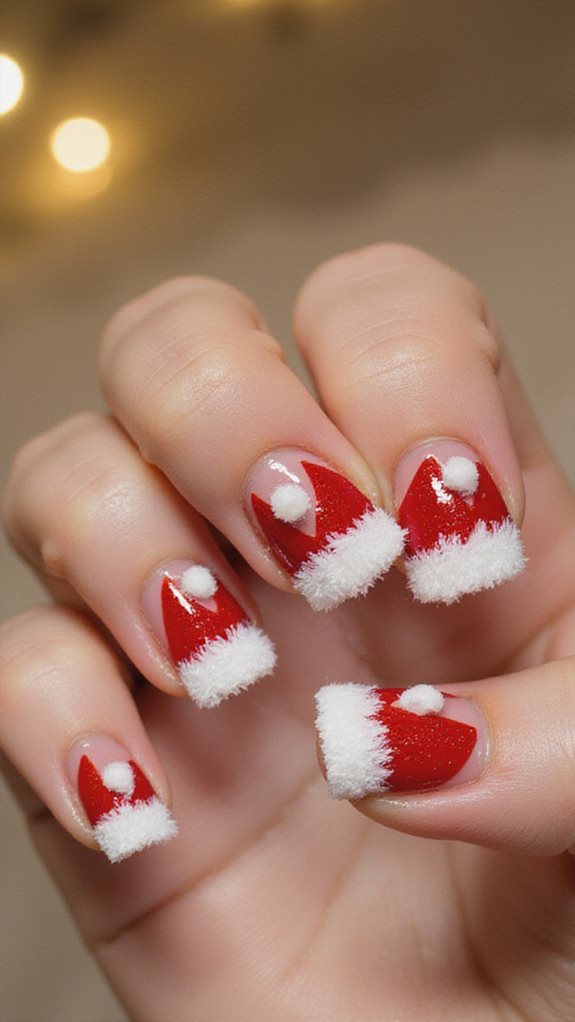
Simple Santa hat nail designs bring festive cheer to your manicure using just three basic colors: red, white, and a nude base. The technique involves painting diagonal red triangles from one corner of each nail, then adding white tips for the fluffy brim and a small white dot at the peak for the pom-pom effect. This creates an adorable miniature Santa hat on each fingertip.
The design works perfectly as an accent nail or across all ten fingers for maximum holiday impact. Its straightforward approach makes it ideal for nail art beginners who want to achieve professional-looking results. A small dotting tool or thin brush helps create clean lines and precise details for the white elements.
Frosted Pine Green
Frosted pine green nails embody winter’s enchanting beauty with their sophisticated combination of deep forest hues and delicate shimmer. This elegant nail art mimics the crystalline frost that settles on evergreen branches during cold winter mornings. The look captures nature’s serene winter palette while maintaining a refined, polished appearance.
Creating this ethereal effect involves layering rich emerald or hunter green as the base, then adding silver or white shimmer using gentle dabbing motions with a makeup sponge. A matte topcoat transforms the shimmer into subtle, snow-like sparkles that catch light beautifully. The finished result is a stunning winter manicure that complements holiday attire and cold-weather fashion perfectly.
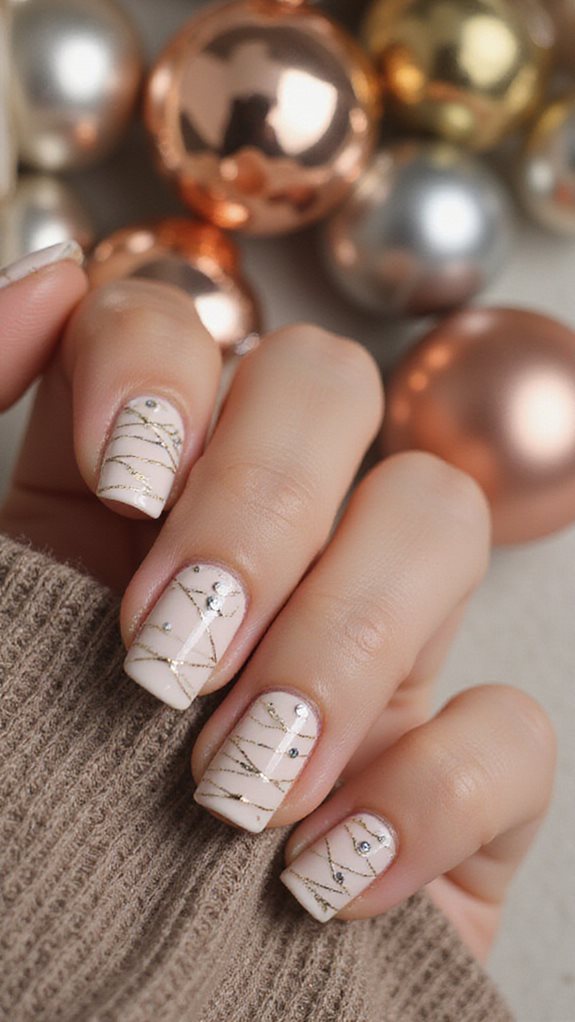
Champagne Glitter Gradient
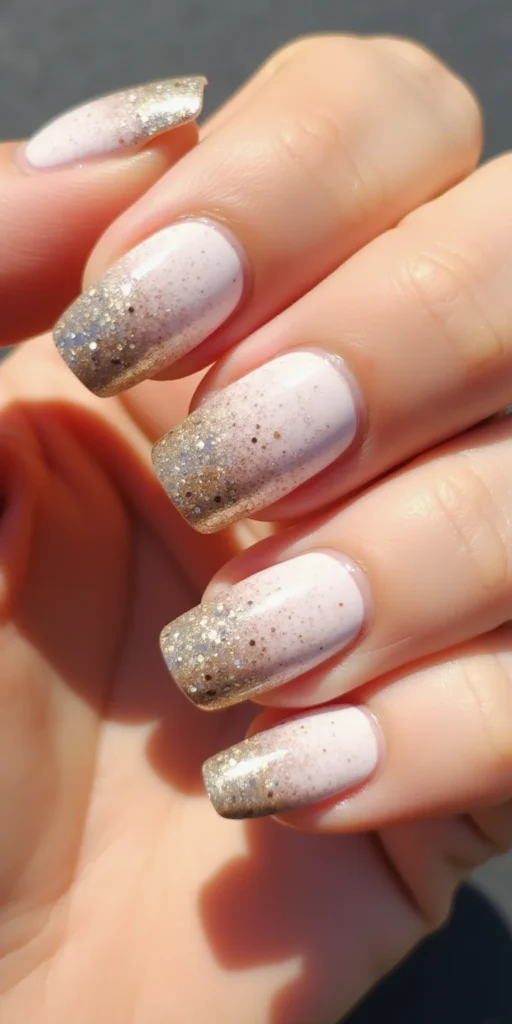
Champagne glitter gradient nails create a luxurious sparkle effect that transitions from intense shimmer to subtle gleam across each nail. This sophisticated technique combines nude or champagne base tones with strategically placed glitter for an elegant, dimensional look. The gradient effect adds depth while maintaining refined sophistication perfect for special occasions.
The application process involves building layers of glitter density from cuticle to tip using dabbing motions with a makeup sponge. Working quickly while polish remains tacky ensures smooth blending between sparkle intensities. A quality top coat seals the design, creating a smooth finish that enhances both durability and visual impact.
Red Velvet Matte Finish
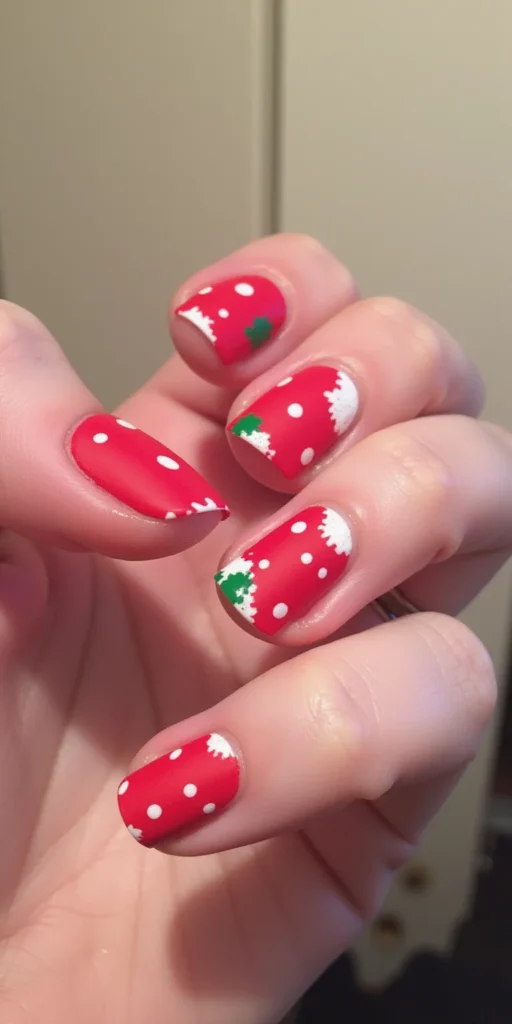
A red velvet matte finish creates an elegant, sophisticated look that transforms ordinary nail polish into a luxurious velvety surface. The matte topcoat eliminates all shine while intensifying the color saturation of deep burgundy or wine-toned reds. This technique mimics the rich texture of actual velvet fabric on your nails.
Apply two thin coats of your chosen deep red polish, allowing each layer to dry completely before proceeding. Use smooth, even strokes when applying the matte topcoat to prevent streaking and maintain uniform texture. Avoid touching the nails immediately after application to preserve the pristine matte surface and achieve that coveted velvet appearance.
Golden Bell Accents
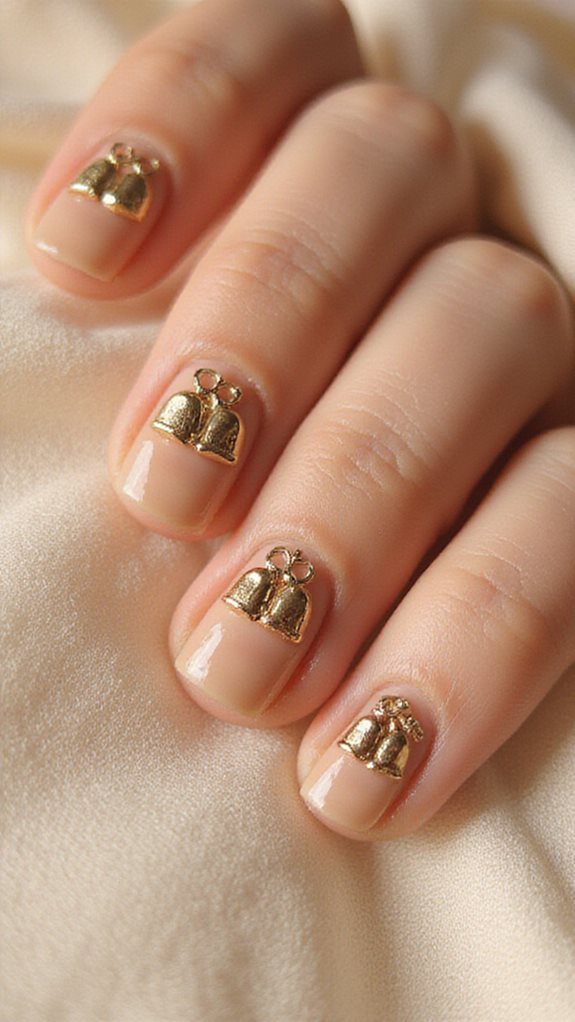
Golden bell accents transform ordinary Christmas manicures into elegant festive masterpieces through delicate metallic details. These shimmering embellishments catch light beautifully, creating eye-catching focal points on accent nails like ring fingers or thumbs. The lustrous golden touches instantly elevate your holiday nail art with sophisticated charm.
Create these stunning accents by hand-painting miniature bells using gold metallic polish or applying tiny bell-shaped decals. Position the bells strategically across accent nails, either scattering multiple tiny ones or featuring a single statement piece. Seal your design with clear topcoat to ensure the golden details maintain their brilliance throughout the holiday season.
Ice Blue Winter Theme
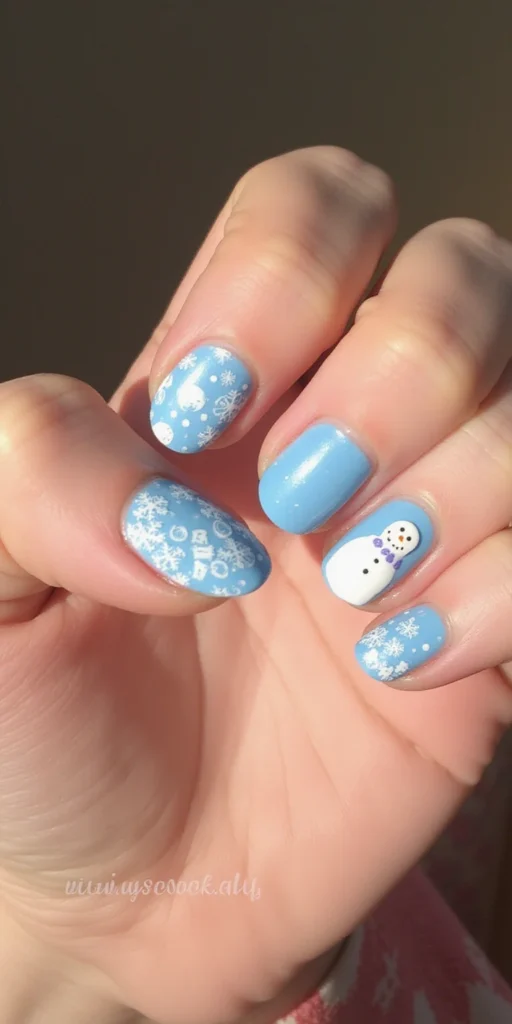
Ice blue hues capture winter’s crystalline beauty while offering a refreshing alternative to traditional warm holiday tones. Create stunning frosty blue ombre effects by blending pale sky blue at the cuticle into deeper arctic shades toward the tips. Apply your lightest shade as the base coat, then use a damp makeup sponge to dab progressively darker blues for seamless color transitions.
Elevate your icy nail art designs with delicate snowflake patterns using white acrylic paint and a fine detail brush. Add silver glitter accents to mimic ice crystals or incorporate holographic topcoats for dimensional sparkle. Finish with matte topcoat for a frosted glass effect, or choose high-gloss for mirror-like shine that reflects winter’s pristine elegance.
Traditional Green and Red Stripes
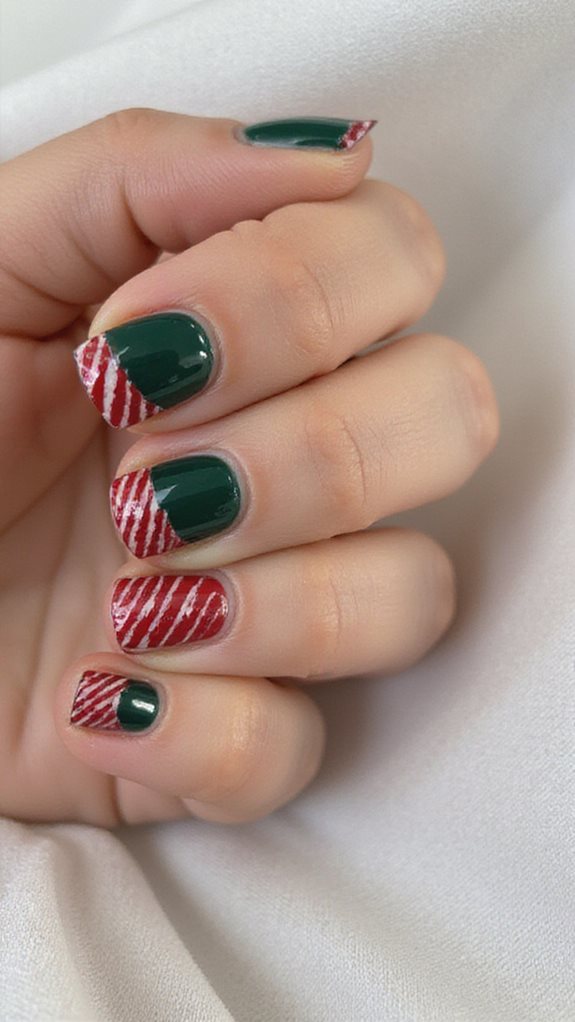
Traditional green and red stripes create a timeless holiday nail design that captures the essence of Christmas elegance. The classic color combination offers versatility for both casual and formal holiday occasions. This pattern works beautifully on any nail length and complements various festive outfits.
Creating perfect striped nails requires precision and quality materials for professional-looking results. Striping tape ensures clean lines while proper base preparation enhances color vibrancy and longevity. The key lies in strategic tape placement and removing it while the polish remains wet to prevent chipping.
Pearl White Elegance
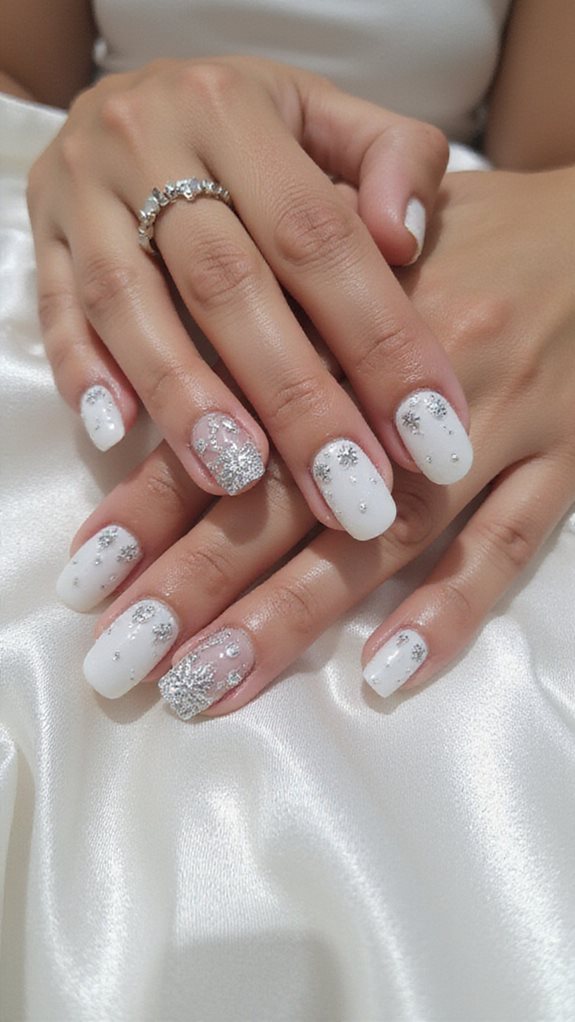
Pearl white nails create sophisticated refinement perfect for holiday celebrations through their timeless elegance. This lustrous look combines a sheer pearl base coat with translucent white polish containing subtle shimmer particles. The technique requires applying thin, even layers while allowing complete drying between each coat.
The elegant pearl effect can be enhanced by gently buffing the surface with a fine-grit buffer after curing. Adding pearl topcoat exclusively to ring finger accent nails creates visual dimension without overwhelming the design’s understated beauty. This winter-appropriate style complements both casual holiday gatherings and formal celebrations.
Cranberry and Gold Foil
Cranberry red and gleaming gold foil create a luxurious nail design that embodies holiday elegance. Start with a rich burgundy base coat applied in two thin layers for even coverage.
Once dry, cut gold foil into small irregular pieces for accent placement. Apply thin foil adhesive to select areas like diagonal strips or fingertips. Press the shimmering foil firmly onto the tacky surface, then gently remove the backing.
Seal with a quality topcoat, brushing carefully to preserve the foil’s sophisticated finish.
Cozy Sweater Pattern
Transform your nails into a cozy winter accessory with cable knit-inspired nail art that mimics your favorite sweater. Begin with a neutral cream or soft gray base, then use a fine detail brush with white polish to create interconnected diamond patterns through overlapping lines. Add subtle gray shadows along one side of each cable twist to create realistic depth and dimension.
Enhance the design with holiday motifs like tiny snowflakes or reindeer silhouettes woven into the cable pattern. Use a dotting tool to create raised texture points that replicate actual knit stitches, giving your nails an authentic fabric-like appearance. Finish with a matte topcoat to eliminate shine and complete the genuine sweater texture.
Metallic Christmas Ornaments
Metallic Christmas ornament nail designs bring festive elegance to your fingertips through reflective chrome, gold, and silver polishes. Create abstract ornament shapes using circular motions and striping tape for clean outlines.
Layer contrasting metallic tones like copper over gold for warmth or silver over chrome for enhanced shine.
Complete the look by adding rhinestones or metallic studs at the “tops” of your ornament designs to simulate hanging caps. These sophisticated nail art creations transform your manicure into miniature holiday masterpieces. The reflective surfaces and elegant curves capture the essence of traditional Christmas decorations perfectly.
Twinkling Light Dots
Dozens of tiny light dots scattered across your nails create the magical effect of miniature Christmas string lights dancing on your fingertips. You’ll achieve this twinkling lights effect using a dotting tool or toothpick dipped in contrasting polish colors. Start with a dark base—navy, deep green, or black works perfectly.
Once dry, create sparkly dots using white, yellow, gold, and silver polish in varying sizes. Don’t follow patterns; randomness mimics authentic string light placement. For enhanced sparkle, apply clear topcoat mixed with fine glitter over completed dots.
Frequently Asked Questions
How Long Do Christmas Nail Designs Typically Last Before Chipping?
You’ll typically see Christmas nail designs last 7-14 days before chipping, depending on your daily activities. When it’s time for proper removal of christmas nail art, use acetone-based remover to preserve your natural nails.
What Base Coat Should I Use for Christmas Nail Art?
You’ll want a gel base coat for intricate Christmas designs requiring extended wear, or choose a shellac base coat for simpler festive art. Both provide superior adhesion and prevent staining from bold holiday colors.
Can I Do These Designs on Short Nails?
Absolutely! You’ll adapt designs for nail length variation effortlessly. Short nails offer excellent nail shape suitability for minimalist Christmas motifs. Focus on single accent nails, tiny snowflakes, or simple stripes rather than complex scenes.
How Do I Remove Glitter Nail Polish Effectively?
You’ll need acetone-based removers for stubborn glitter. Soak cotton pads, press firmly on nails for thirty seconds, then gently push glitter off. Gentle nail polish remover won’t cut through dense sparkles effectively.
What Tools Do I Need for Simple Christmas Nail Art?
You’ll need basic brushes, dotting tools, and striping tape for placement technique. Select red, green, white, and gold polishes for your color selection. Add nail art pens for precise details and topcoat for durability.
Finally
You’ve mastered nine stunning Christmas nail designs that’ll transform your holiday look. Apply base coats properly, let each layer dry completely, and seal with quality topcoat for lasting wear. Don’t rush the process—precision creates professional results. Experiment with these techniques throughout the season, mixing metallics with classics or combining patterns for unique variations. Your nails will become festive accessories that complement every holiday outfit you’ll wear this December.