
21 Red Christmas Nails for Moms Who Want One Classic Set

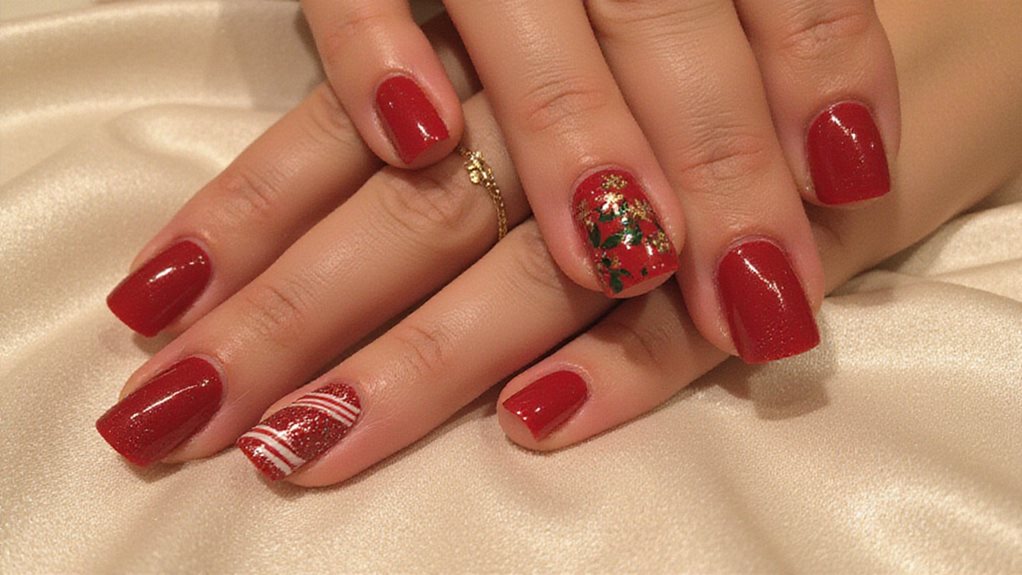
Red is the one color nobody questions at a Christmas party, but the shade matters as much as the design. Blue-based reds like cherry and crimson look cool and bright, while scarlet leans warm and wine reds lean purple.
If you only paint one holiday set between school concerts and gift wrapping, make it red.
Each design below names the red it suits best. For sets with fewer steps, see these simple Christmas nails, and if your nails barely pass the fingertip, the Christmas designs for short nails are sized for that length.
1. Classic Cherry Red With Gold Accents
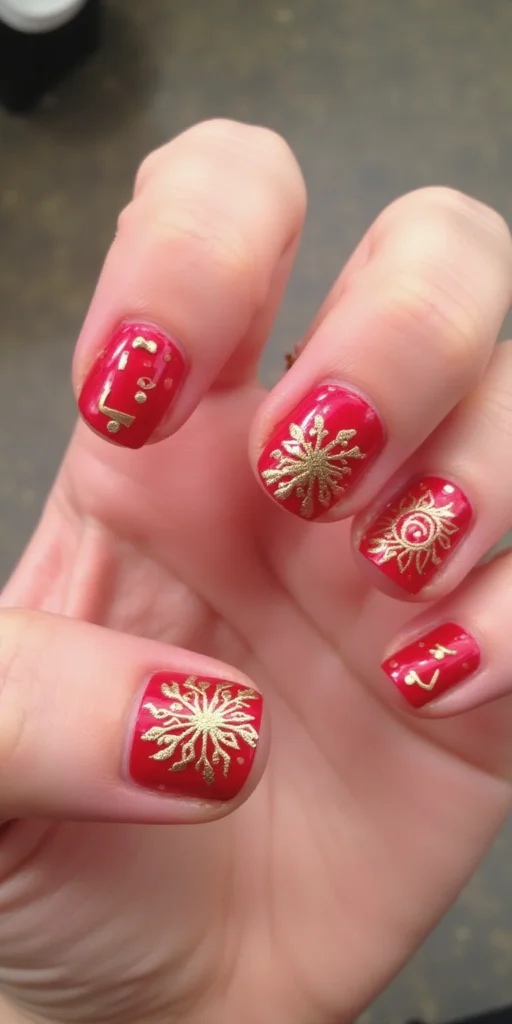
Cherry red is bright enough to carry gold without looking busy. Once two coats are dry, add gold on the ring finger, either as a thin French tip or a sweep of gold glitter at the cuticle.
One gold detail per hand keeps it classic. Gold on all ten nails starts to compete with the red. Go with a warm yellow gold rather than rose gold, which turns pink next to cherry.
Time check: about 25 minutes, including drying, and the gold hides small chips at the tip for a few extra days.
2. Deep Burgundy Ombre Christmas Nails
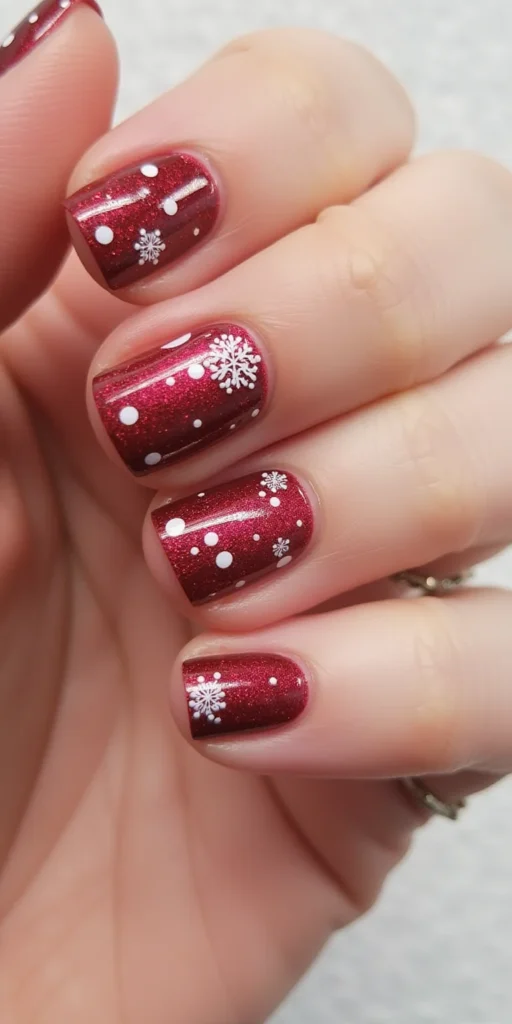
A burgundy ombre runs from a mid red at the cuticle to almost black-red at the tip. You need three shades, such as a classic red, a burgundy, and an oxblood.
Paint stripes of all three side by side on a makeup sponge, press it onto the nail, then press twice more in the same spot to build color. Clean the skin around the nail with a small brush dipped in remover.
The first sponge layer looks patchy. It evens out by the third press, and a glossy topcoat smooths the texture. Dark reds like this one carry into these January nail ideas.
3. Candy Cane Striped Red and White Design
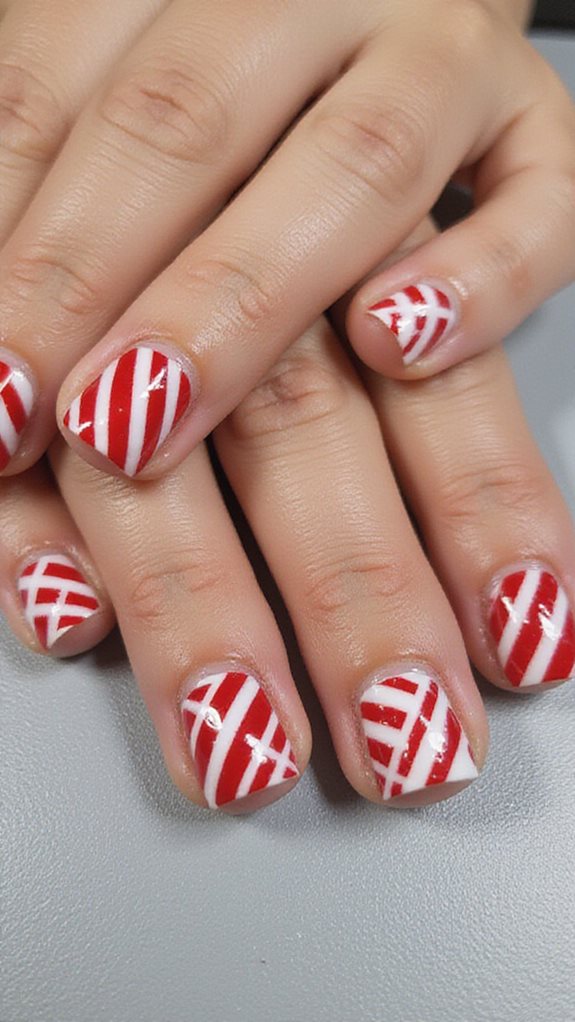
Most candy cane nails put red stripes on white, but this version starts with red. Paint two coats of a bright cherry red, let them dry, and lay strips of striping tape across the nail at an angle with gaps between them.
Paint white over the gaps, then peel the tape while the white is still wet. The red under the tape becomes the stripes.
White over red needs two coats to look solid. Paint the second one before you peel, while the tape is still down.
4. Matte Red Nails With Snowflake Art
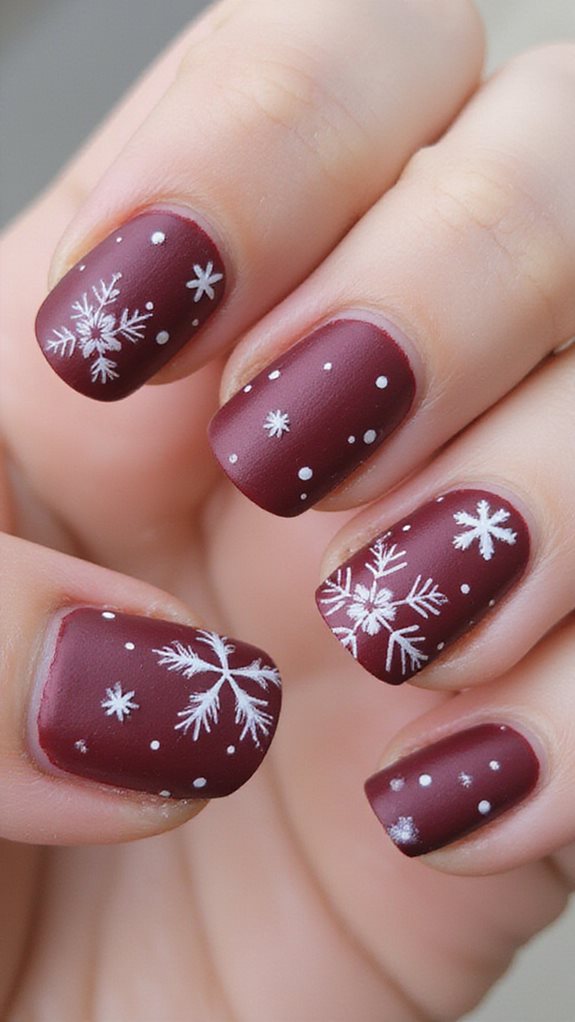
A matte red looks deeper than the same shade in gloss, and white snowflakes stand out against it. Lay down two coats of true red, add a matte topcoat, then draw the snowflakes over it with a white nail art pen.
Drawing on top of the matte coat keeps the white crisp. Dab a little glossy topcoat on each snowflake for a shiny-on-flat contrast. To stretch a matte set, use these tips for nails that last.
Matte topcoat shows chips and fingerprints sooner than gloss, so plan on wearing this set for four or five days, and keep the matte bottle handy for a quick refresh.
5. Glittery Red Christmas Tree Accent Nails
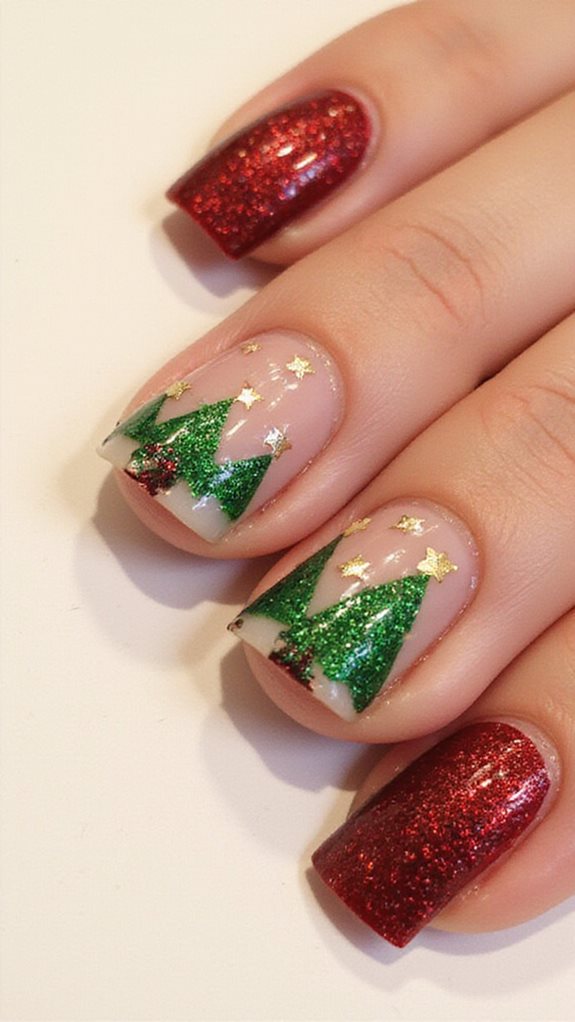
Here the red nails carry the glitter and the accent nail carries the tree. Paint four nails in red and brush fine red glitter over the tips.
For the accent, paint a nude or white base, then draw a narrow triangle in green glitter polish using a thin liner brush and add a gold dot on top.
Green glitter polish is a clear base with glitter in it, so the tree needs two or three passes to look solid. Give each pass a minute to dry.
6. Ruby Red With Silver Rhinestone Details
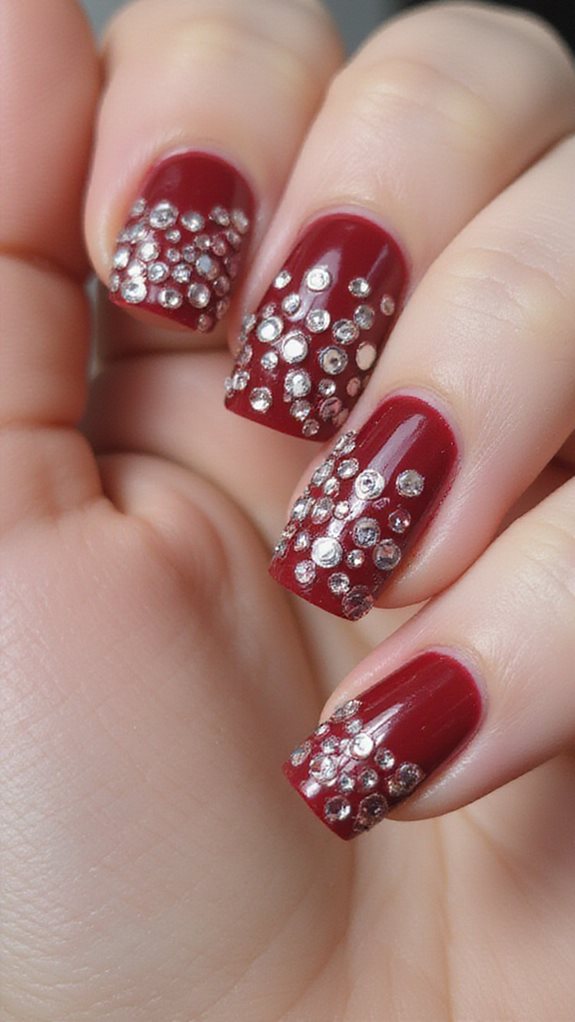
Ruby red has a slight jelly depth that makes silver rhinestones look brighter. Over the dry base, set three or four small flat-back stones in a line along the cuticle of one accent nail.
Place each stone on a dot of nail glue with a wax pencil or a dampened orange stick. Brush topcoat around the stones, not over them, so they keep their sparkle.
Rhinestones snag on hair and knits. Near the cuticle, where the nail curves less, they stay put longer. On busy weeks, put them on one hand only.
7. Red Velvet Textured Holiday Manicure
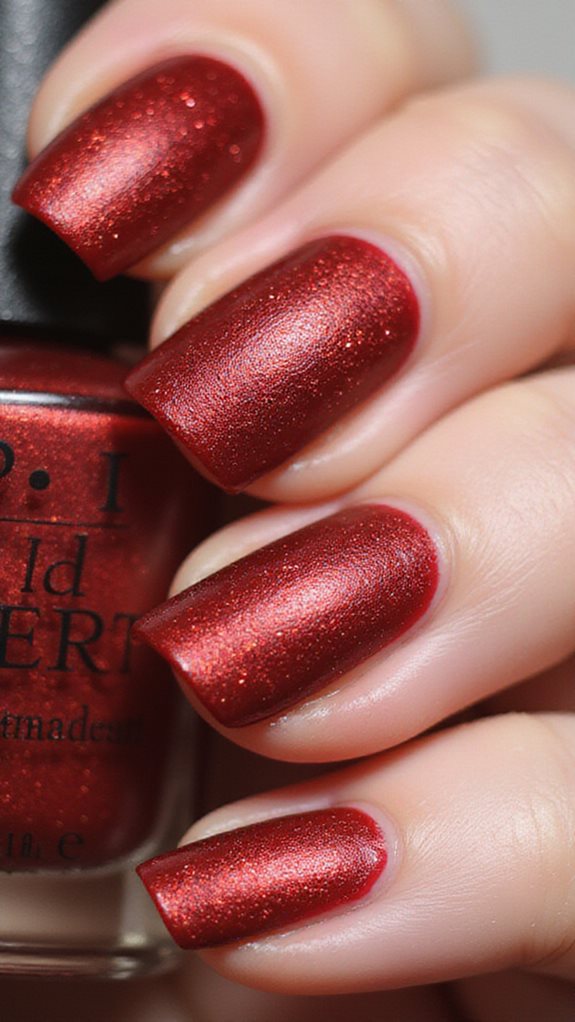
Velvet nails today often mean magnetic cat-eye polish, which shifts like crushed velvet when you move your hand. Paint a red cat-eye gel, hold a nail magnet over the wet polish for about 10 seconds, and cure it under an LED lamp.
Moving the magnet in small circles spreads the shimmer for the velvet look. Cat-eye comes in gel and in some regular formulas, so check the bottle before you buy. A black or burgundy base under the red makes the shift look deeper.
8. Crimson Nails With Holly and Berry Design
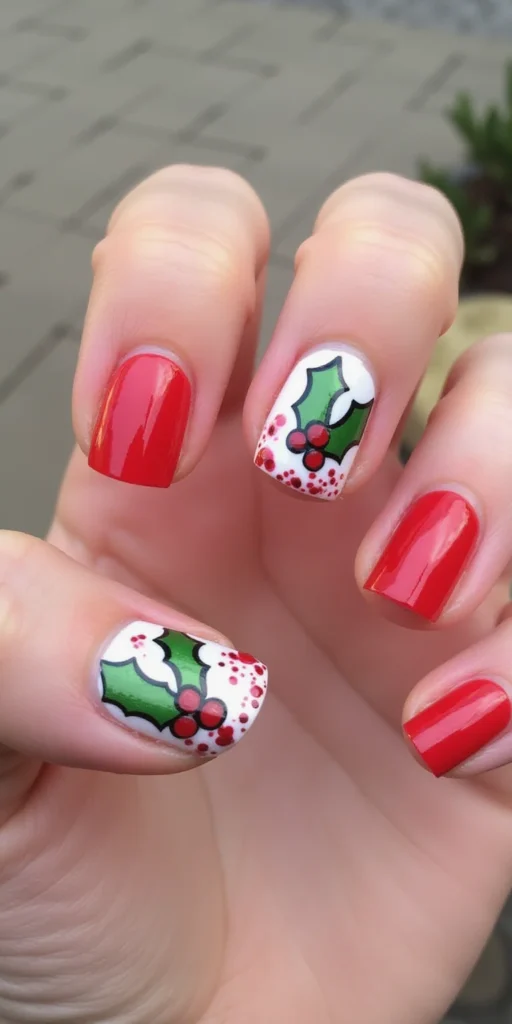
Crimson is a deep blue-based red, which makes green holly leaves stand out. On a crimson base, paint two small leaves in forest green near one corner of each accent nail.
Add three berries with a dotting tool, but in white or gold instead of red. Red berries disappear against a crimson base. Gold berries look warmer.
Keep the holly to one corner. A cluster across the whole nail hides the crimson. Wear it from the first December party through Christmas morning, since holly fits the whole season.
9. Red Chrome Christmas Nail Look
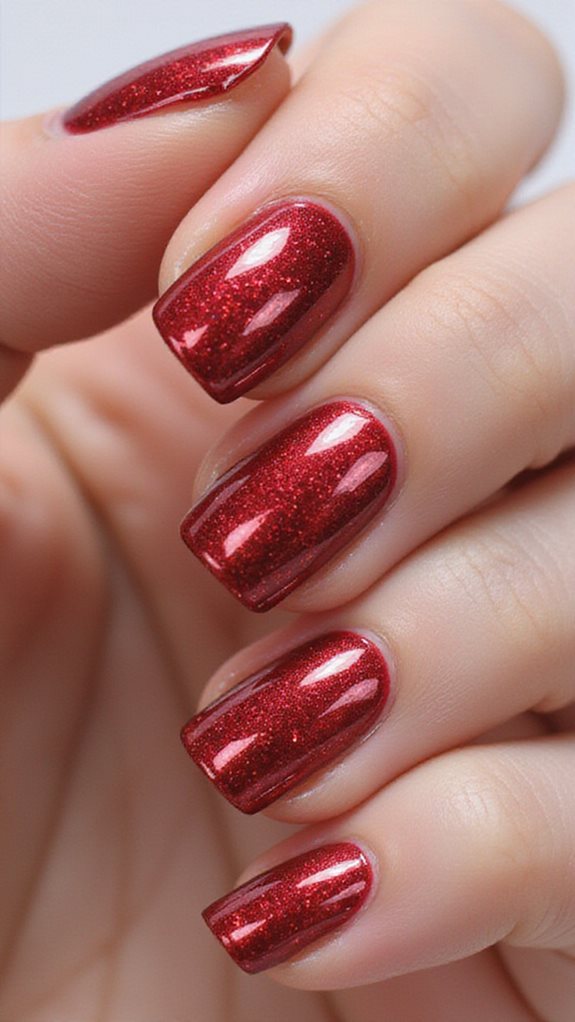
Red chrome uses chrome powder over gel, so it needs an LED lamp. Paint and cure a red gel color, then a no-wipe gel topcoat, and cure that too.
Rub chrome powder over the cured topcoat with a silicone tool or eyeshadow sponge until it turns to a mirror. Seal with another layer of no-wipe topcoat and cure again.
Red chrome powder over red gel gives the deepest candy-apple shine. A pearl powder over the same red looks softer, like glazed sugar. Expect about two weeks of wear.
10. Festive Red Plaid Nail Art Pattern
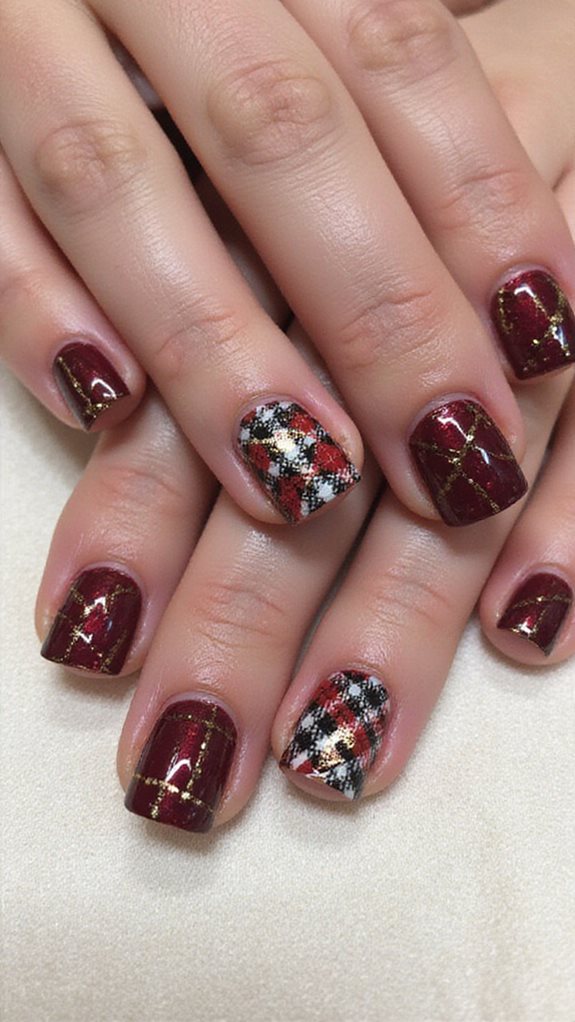
Red plaid works best with a bright base and darker red lines. On a cherry red base, paint two thick burgundy stripes each way, then a thin white line beside each stripe.
Two reds instead of red and green make the plaid look like a flannel shirt. Add a single green line if you want it more Christmas-y. Forest green works best.
Shortcut: plaid nail stickers in the same two reds take about five minutes, which helps when the class party is tomorrow morning and you have one free evening.
Keep red off your skin
- Brush a thin layer of petroleum jelly around the cuticle before you paint
- Sharpen the edge with a flat brush dipped in acetone
- Wipe the polish brush on a paper towel between nails so it doesn’t streak
11. Scarlet Red With Christmas Lights Design
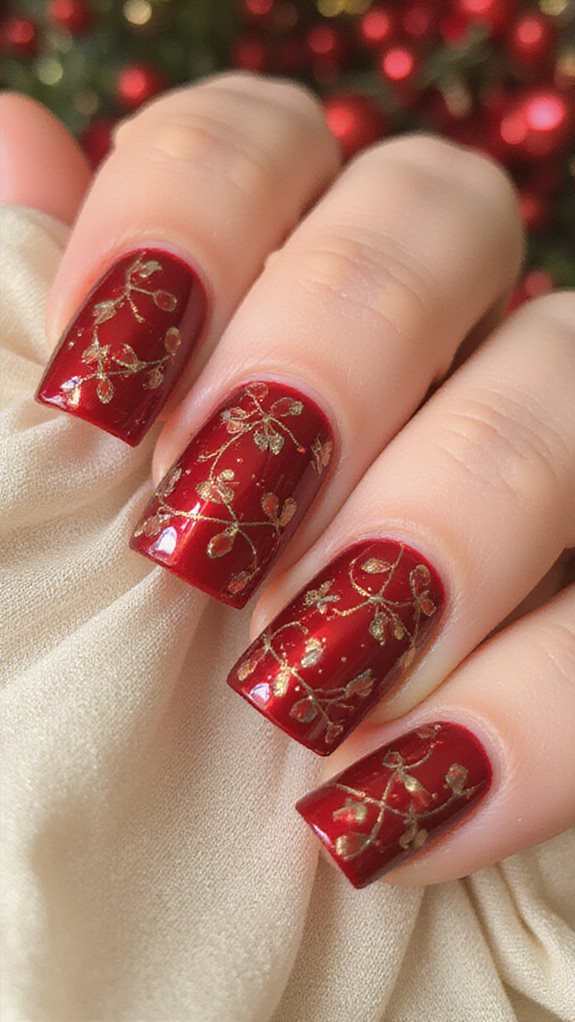
Scarlet leans orange, so warm bulbs in yellow, gold, and white suit it. Over the dry color, draw a loose black wire across each nail using a striping brush. Black wire looks crisper than green on scarlet.
Dot the bulbs along the wire with a small dotting tool, about 2 mm apart. Skip red bulbs, which sink into the base.
Keep the lights on two accent nails and leave the rest plain scarlet. A full set looks crowded on such a bright base. Glossy topcoat makes the bulbs look lit.
12. Red Marble Effect Holiday Nails
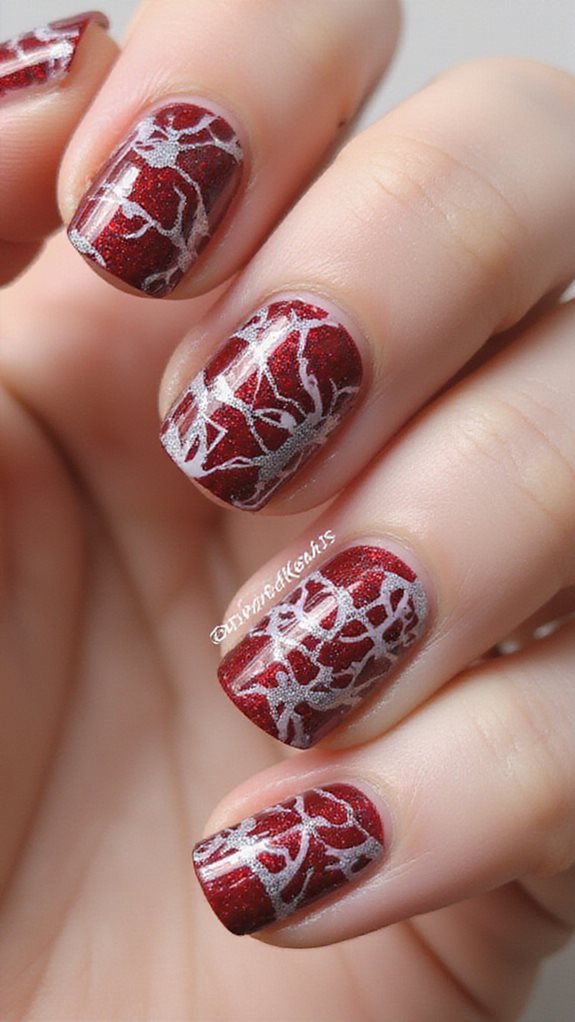
A red marble uses wet polish on wet polish, so it goes fast. Paint a burgundy coat, add a few drops of cherry red and one drop of white while it’s wet, and pull a thin brush through them in one pass.
Stop after one or two passes, or the colors blend into pink. A thin gold vein added with a fine brush once it dries is optional. Clean up any polish on the skin with an old brush and remover before it dries.
13. Traditional Red With Poinsettia Accents
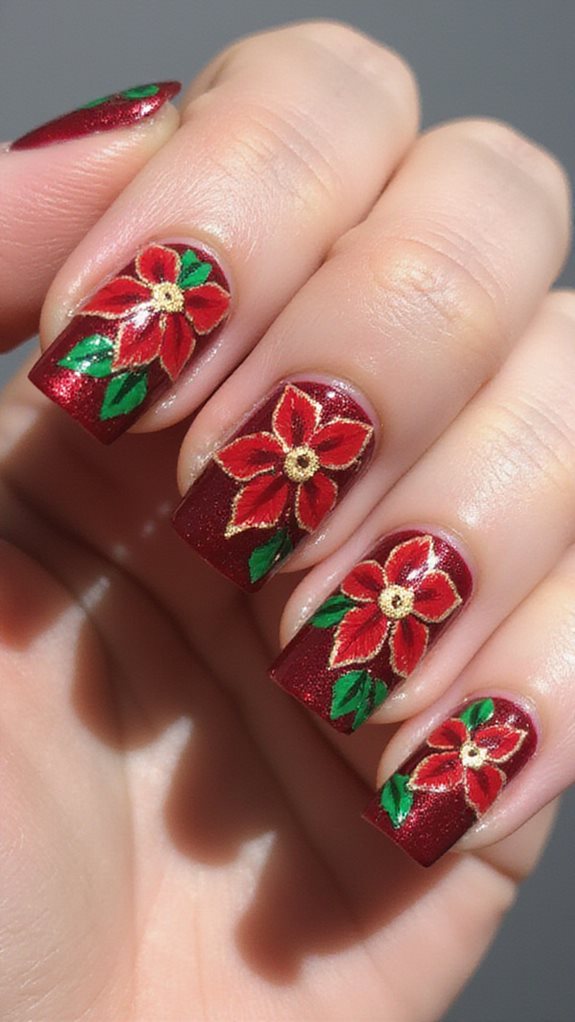
Paint four nails a traditional true red and save the ring finger for the flower. On a cream base, make each petal with one stroke of a small brush loaded with red, pressing down and pulling out to a point.
Five or six petals around a center make the bloom. Add a cluster of gold dots in the middle.
A darker red stroke along one side of each petal gives it shape. Skip it if your hand isn’t steady, since the flat version still looks like a poinsettia.
14. Wine Red Nails With Gold Foil Details
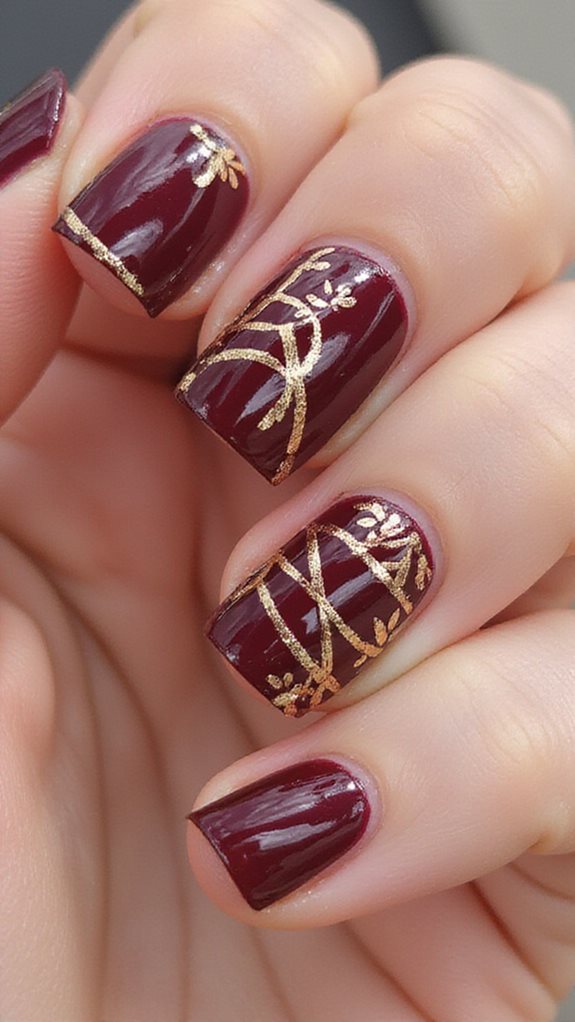
Wine red leans toward purple, which makes gold foil look warmer. Paint two coats, and while the second is tacky, press a few small flakes of gold foil near the cuticle with tweezers.
Use fewer flakes than you think you need. Three or four per nail look like gilding, while a full nail looks like a craft project. Gold foil also shows up in these New Year’s Eve nail ideas.
Foil edges catch and lift. Two coats of topcoat flatten them. Wine red also works well into January, so this set keeps going after the tree comes down.
15. Red Gradient Christmas Sunset Design
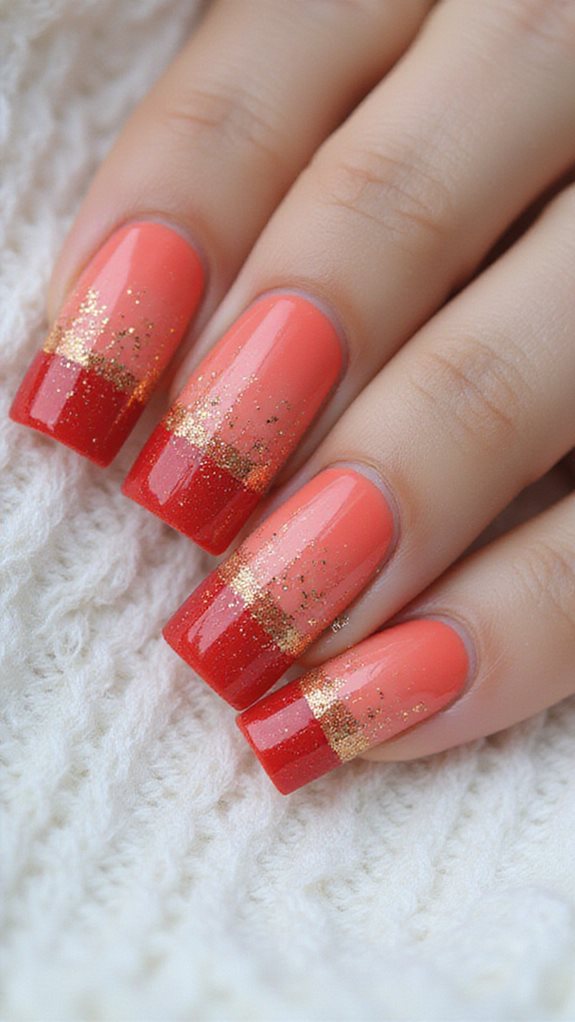
A red sunset runs from crimson near the cuticle to coral at the tip. Paint a white base first so the lighter shades stay bright, then sponge on crimson, red, and coral in stripes, pressing three times to blend. It takes about 30 minutes.
Keep the coral to the tip third. Too much orange stops it from looking like Christmas. Wipe the skin with a cotton swab and remover, then add a thick topcoat to hide the sponge texture.
16. Bold Red With White Snow Tips
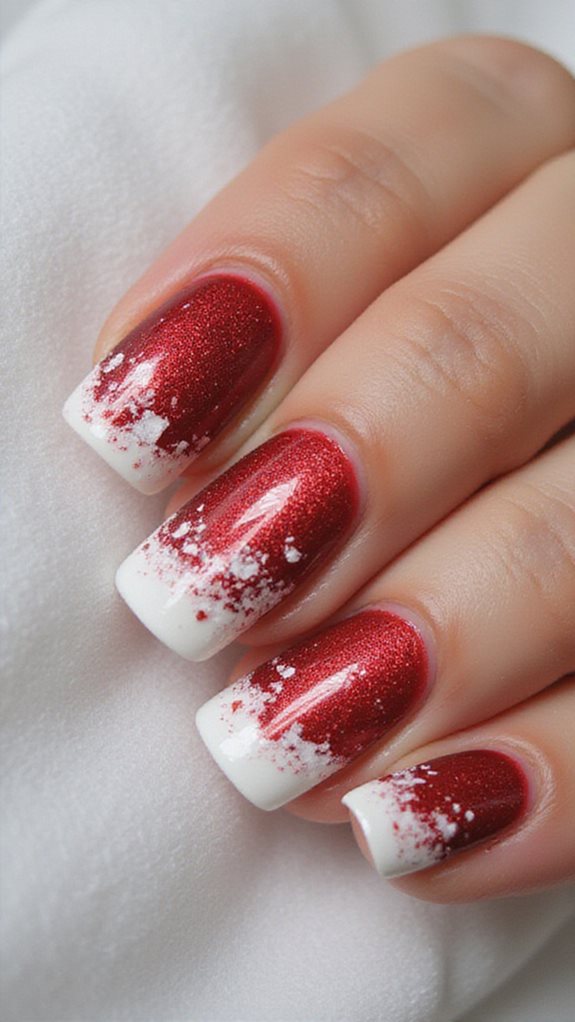
Snow tips swap the French white for a frosted one on a red base. Start with a bright red and let it dry for 15 minutes.
Paint a thin white tip with a French tip guide, then dab iridescent glitter along the line with a sponge so the edge looks like settled snow.
White over red can turn pink if the first coat is thin. A French-tip white covers in one coat. The glitter edge also hides a wobbly line, which helps if you’re painting your right hand with your left.
17. Red Velour Powder Christmas Manicure
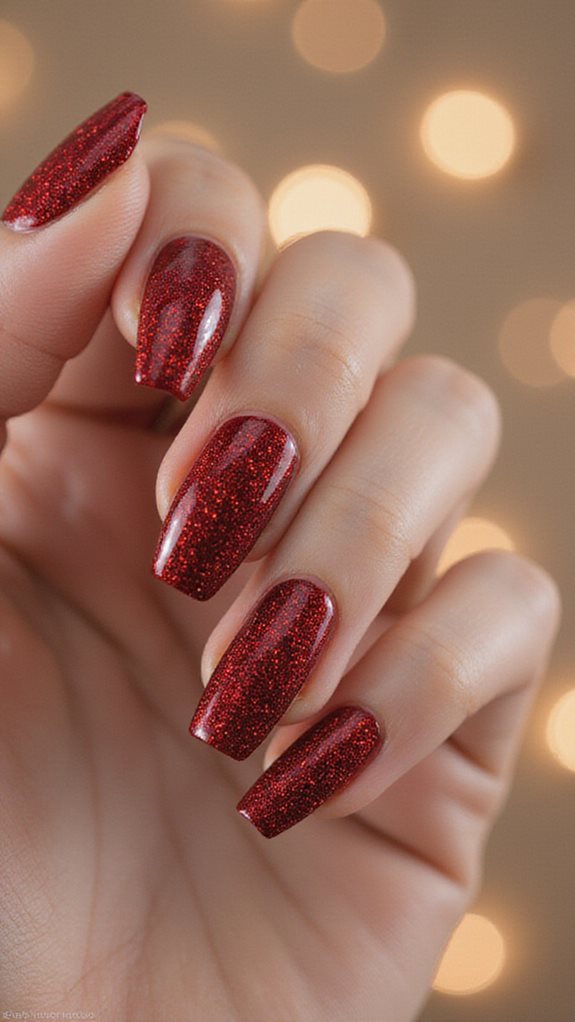
Velour powder, also called flocking powder, gives red a fuzzy texture you can feel. Paint a deep red, and while it’s tacky, pour the powder over the nail, press it in with a fingertip, and tap off the extra.
Skip the topcoat, since any topcoat flattens the fuzz. Flocked tips go bald within two or three days, so save this one for a single party. Do it the afternoon of the party, and keep your hands out of dishwater until the next morning.
18. Cranberry Red With Mistletoe Art
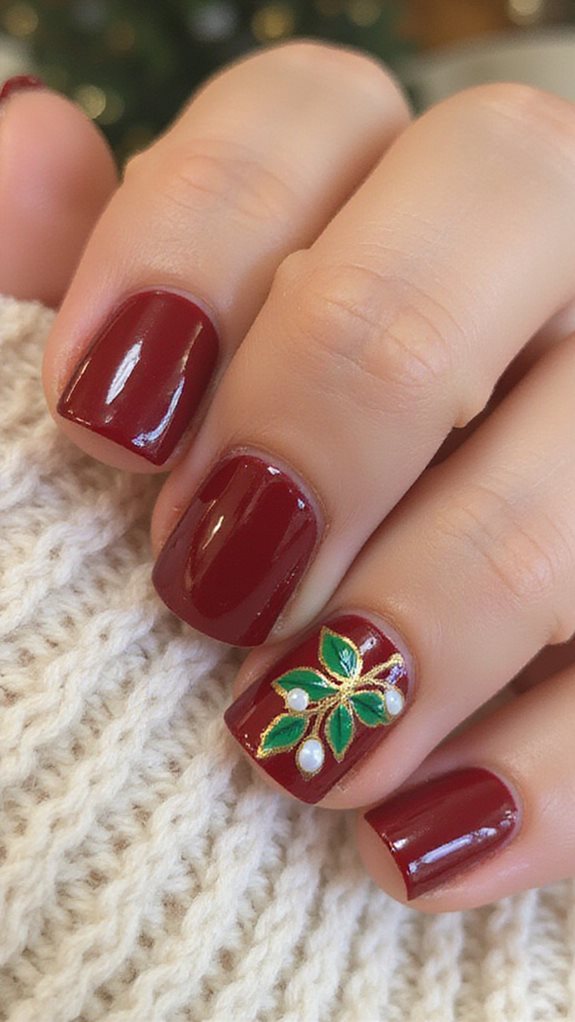
Cranberry is a muted red, which makes it a good backdrop for sage green. Once the base is dry, add two pairs of small sage leaves on each accent nail.
Mistletoe berries are white, so dot two or three pearl white dots where the leaves meet. A fine dotting tool keeps them small. Sage and cranberry carry over into these winter nail designs for January.
Real mistletoe leaves grow in pairs. Painting them in twos instead of clusters makes the sprig look right. Sage on cranberry also looks quiet enough for an office lunch or a church service.
19. Red Glass Effect Holiday Nails
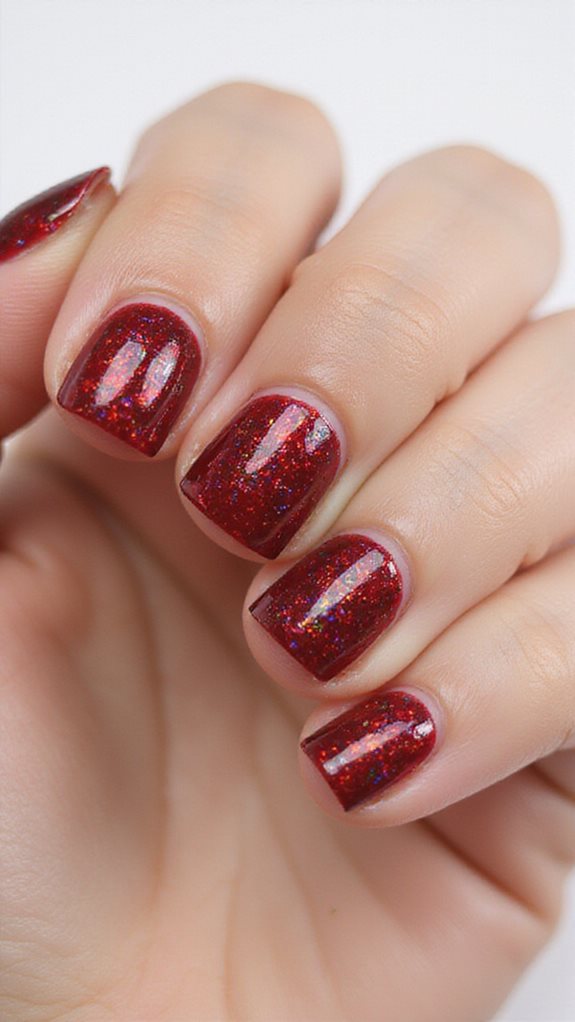
Glass nails use sheer red jelly polish layered until it looks like stained glass. Paint three or four thin coats of a red jelly, giving each two minutes to dry. Plan about 25 minutes with drying.
Between the second and third coats, press a few holographic flakes onto the nail. The jelly layers on top make them look suspended inside. Silver or gold flakes both work on red.
Jelly polish streaks on the first coat. By the third coat it smooths out, so give it time.
20. Vintage Red With Retro Christmas Motifs
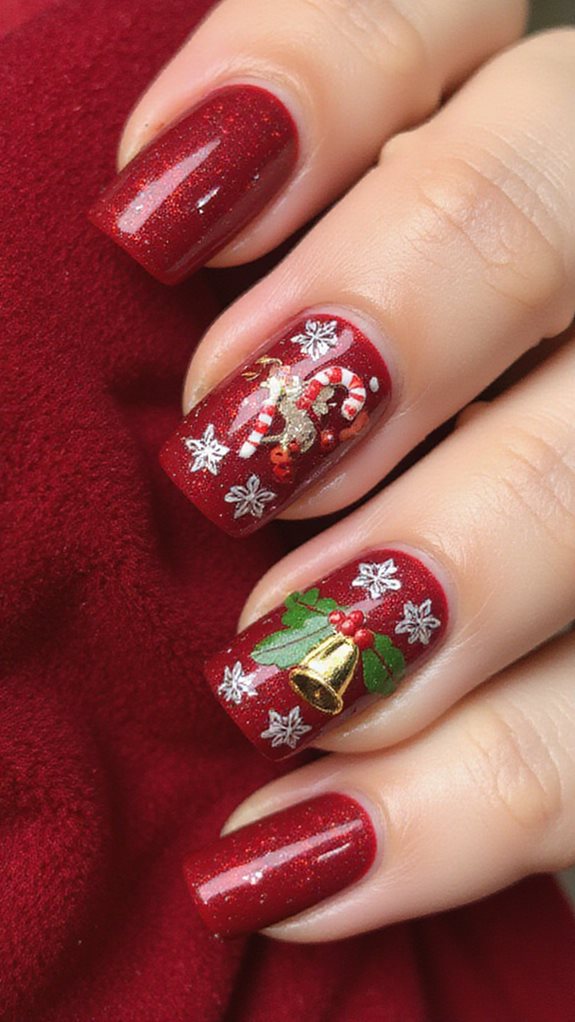
Vintage Christmas nails borrow from mid-century ornaments and wrapping paper. Paint a cherry red, then add white polka dots using the round end of a bobby pin on two nails and a thin gold candy cane on one.
A cream accent nail with tiny red gingham squares fits the same look. Finish glossy, since the shine looks more like old enamel ornaments than a matte coat does.
Thrift-store ornaments and red-and-white cookie tins make a matching backdrop for holiday photos, so this set suits a baking afternoon.
21. Red Negative Space Geometric Design
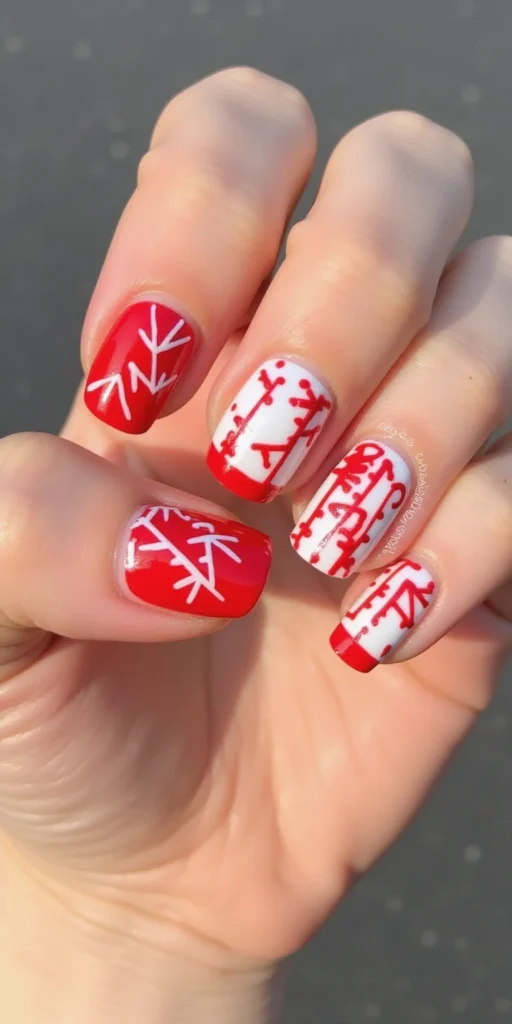
Negative space keeps half the nail bare, so the red looks bold without covering everything. Paint a clear base coat, then place two pieces of tape in a V at the tip.
Paint red inside the V and pull the tape off before it dries. Seal the whole nail with topcoat, bare parts included. It suits short nails well.
Bare nail shows every ridge and stain. Smooth the surface with one pass of a fine buffer before you start, and use a base coat that dries clear.
Picking Your Red
Pick the shade first and the design second. Cherry and crimson suit gold and white details, scarlet suits warm bulbs, and wine and cranberry suit foil and sage green.
The quickest options here are the matte snowflakes, wine red foil, and velour powder, at about 20 minutes each. Chrome and cat-eye velvet need gel and a lamp, so plan those for a salon visit or an at-home gel kit.
Frequently Asked Questions
How Long Do Red Christmas Nail Designs Typically Last?
Regular red polish lasts about five to seven days with a base coat and topcoat. Gel lasts two to three weeks. Bright reds show tip wear sooner than nudes, so add topcoat along the edge every few days.
What Nail Shape Works Best for Christmas Red Manicures?
Almond and oval shapes suit glossy reds because the curve catches the shine. Squoval works well on short nails and chips less at the corners.
Can I Do Red Christmas Nails on Short Natural Nails?
Yes. A deep red on short nails is a classic look on its own. Keep any art to one motif on an accent nail and paint the rest solid.
How Do I Prevent Red Nail Polish From Staining My Nails?
A base coat under every red is the main defense against yellow staining. For stains, soak in lemon juice for a few minutes or buff lightly, and the tint fades within two weeks. Acetone won’t lift a stain.
What’s the Best Base Coat for Vibrant Red Christmas Colors?
For regular polish, a standard or ridge-filling base coat works under red. Gel base coat only works with gel polish and an LED lamp. A ridge filler helps most under jelly and chrome reds, which show every bump.





3 Comments