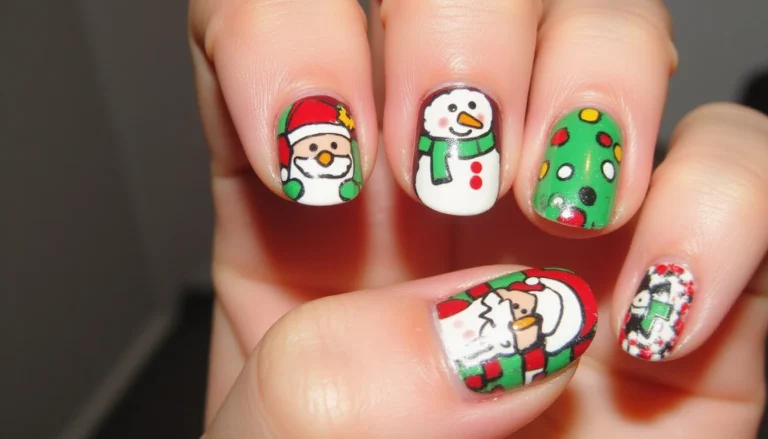
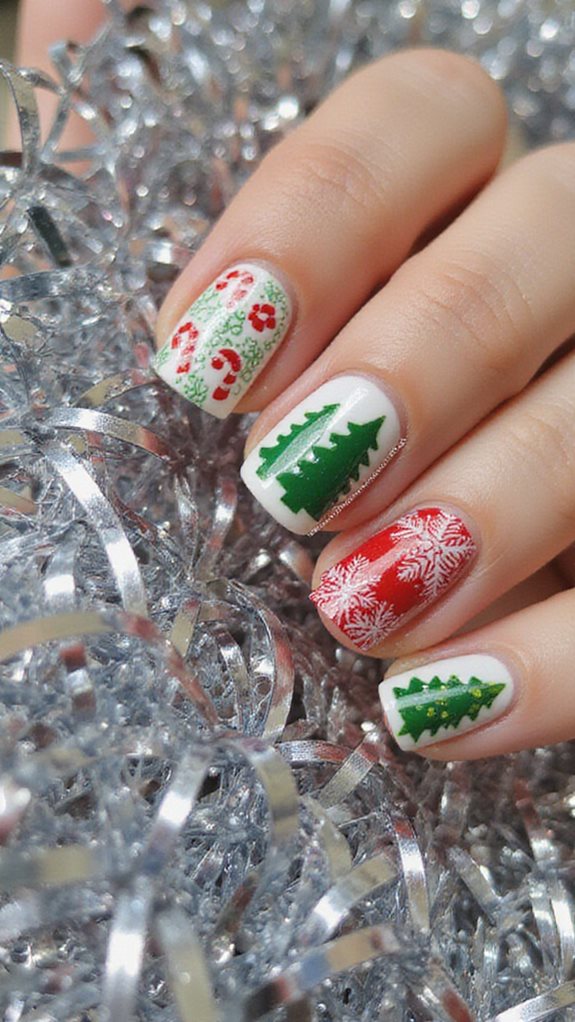
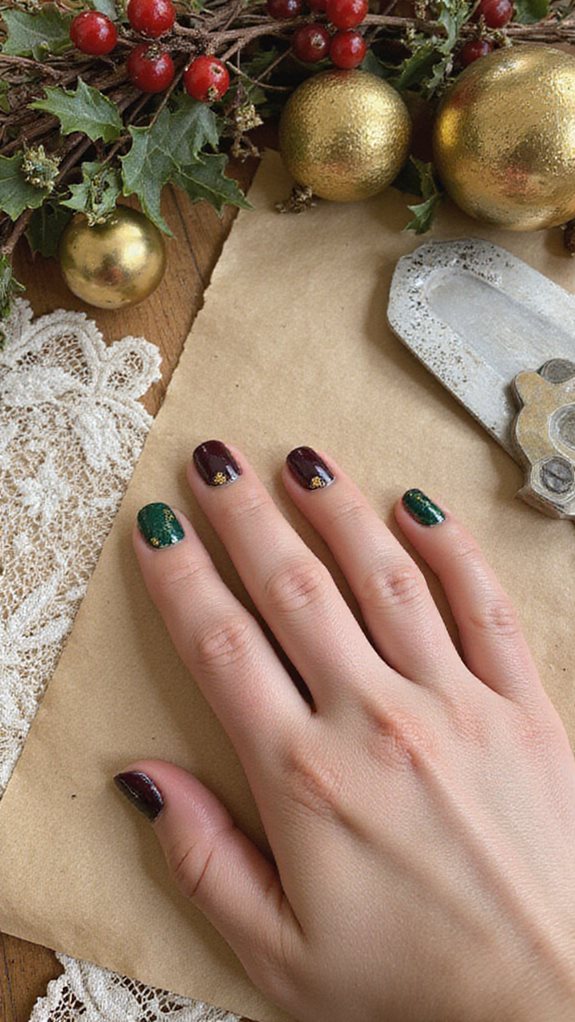
21 Short Christmas Nails
You’ll achieve stunning short Christmas nails by selecting from 21 festive designs including candy cane stripes, metallic snowflakes, and holly berry French tips. Apply base coat, then create accent nails using fine detailing brushes for intricate motifs like reindeer silhouettes or miniature Christmas trees. Finish with high-gloss topcoat for durability and enhanced reflectivity.
Incorporate champagne shimmer, nutcracker-inspired palettes, or New Year’s countdown themes for cohesive holiday styling. These techniques unlock countless festive possibilities for your seasonal manicure arsenal.
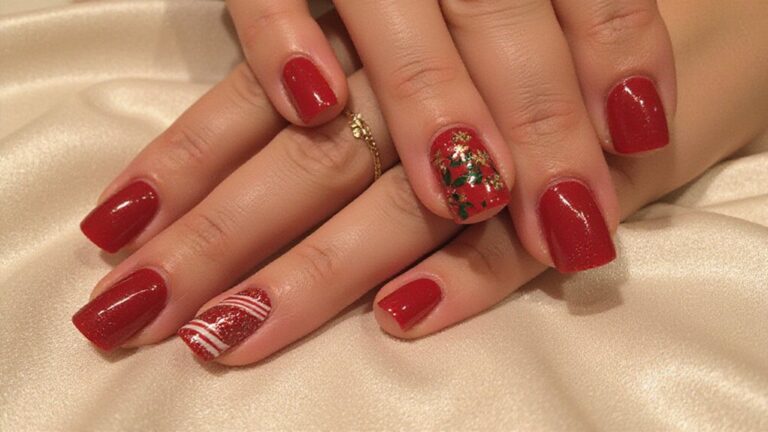
Classic Red and Green Candy Cane Stripes

Creating classic red and green candy cane stripes requires a steady hand and proper technique for professional results. Begin with a clean white base coat and allow it to dry completely before proceeding.
Use a thin striping brush to apply red polish in diagonal lines at 45-degree angles, maintaining consistent spacing and width throughout.
Advanced candy cane details can elevate your design with authentic curved elements. Apply a dotting tool to create small hooks at the stripe endpoints, mimicking the natural curvature of real candy canes.
Finish with a high-quality topcoat to seal the design and prevent chipping, especially on shorter nails where intricate details show best.
Minimalist Gold Snowflake Accents
Minimalist gold snowflake accents offer sophisticated holiday nail art without overwhelming the natural nail bed. Select one accent nail per hand, typically the ring finger, and apply a neutral base like nude or soft pink. Once dry, use a fine detail brush to create simple six-pointed snowflake patterns with gold polish.
These delicate metallic accents require precise hand control and steady application for optimal results. Focus on clean, simple designs rather than complex structures to maintain the minimalist aesthetic. Seal with a high-quality top coat to prevent chipping and enhance the gold’s luminosity for lasting festive appeal.
Holly Berry French Tips
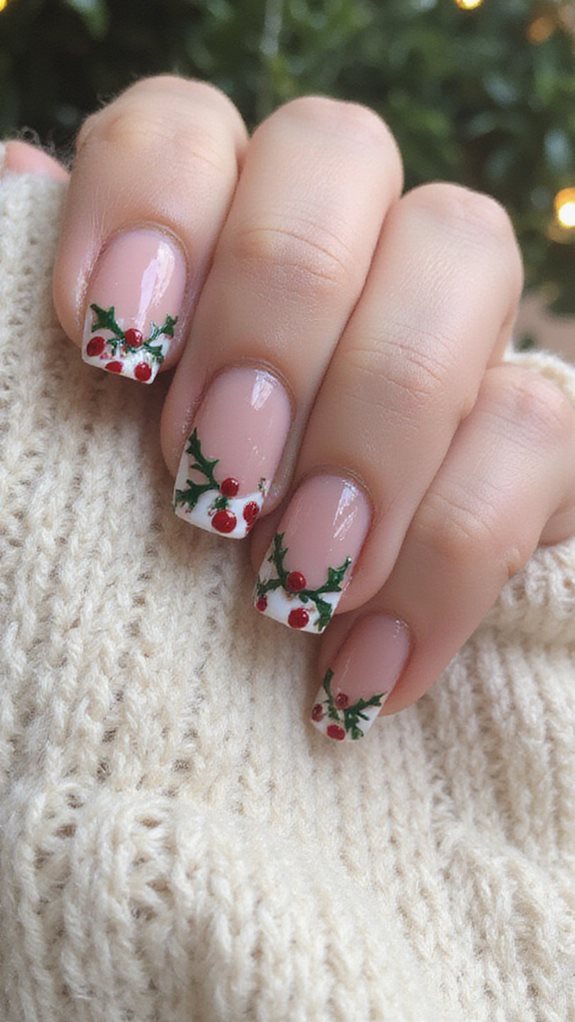
Holly berry French tips offer a festive twist on the classic manicure by incorporating miniature red berries and green leaves at the nail tips. This design begins with a nude or clear base coat, followed by creating small red dots in triangular clusters to represent holly berries.
Green leaves are painted using pointed oval shapes with gentle curves to complete the botanical look.
The technique adds elegant holiday charm while maintaining a sophisticated appearance suitable for seasonal celebrations. Small white highlights on each berry create dimensional depth, while the overall design stays refined and wearable.
A quality top coat seals the detailed artwork, ensuring the festive manicure maintains its professional finish throughout the holiday season.
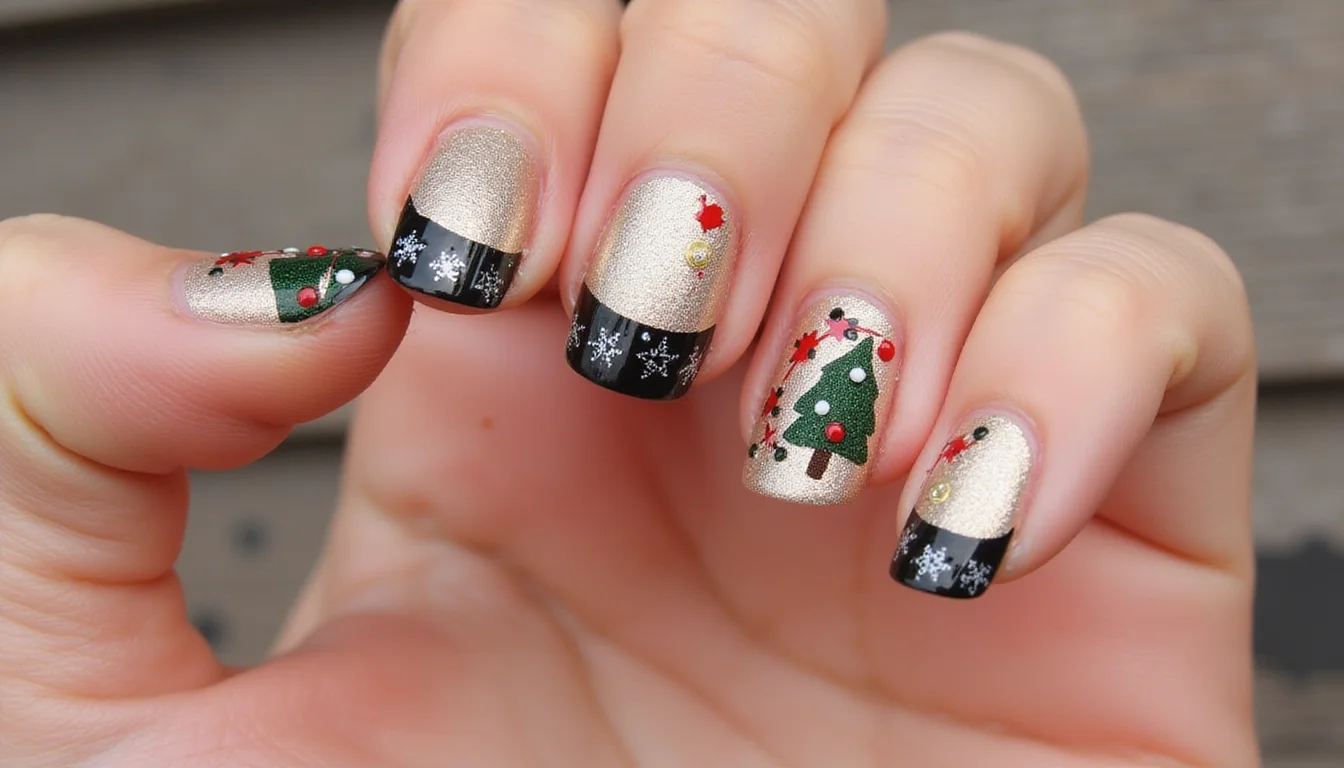
Glitter Gradient Christmas Trees
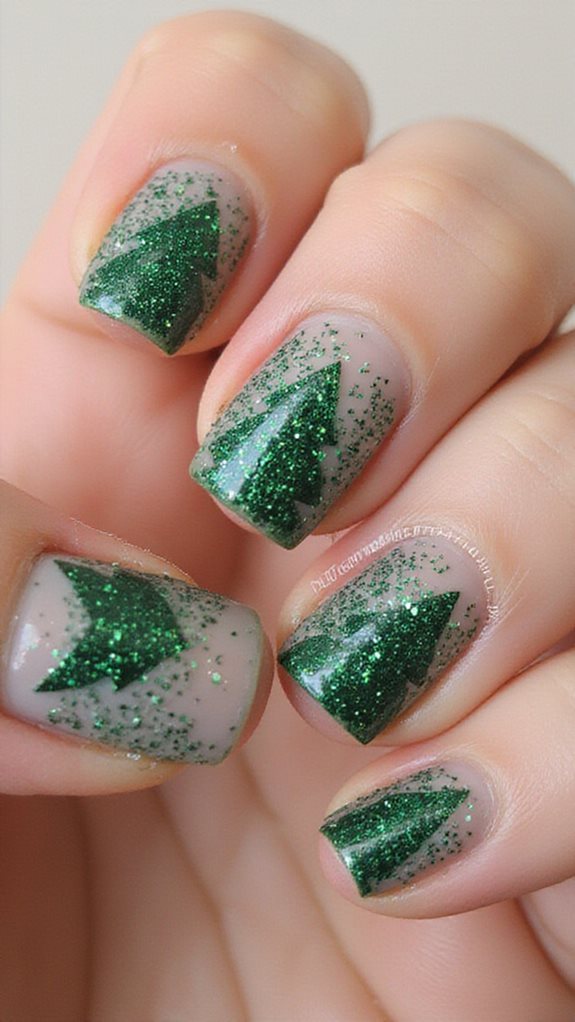
Glitter gradient Christmas trees transform ordinary nails into festive masterpieces that shimmer with holiday magic. Begin with a base color, then build a stunning ombre effect using fine green glitter concentrated at the cuticle and gradually fading toward the tips. Apply the glitter in thin layers with a makeup sponge to achieve seamless blending.
Once your gradient reaches the perfect intensity, paint delicate tree silhouettes over the glittered base using a fine detail brush and dark green or black polish. Create triangular shapes that progressively narrow from bottom to top, then crown each tree with a tiny gold star. Finish with a high-quality topcoat to lock in the design and maximize the sparkle effect.
Tiny Reindeer Silhouettes
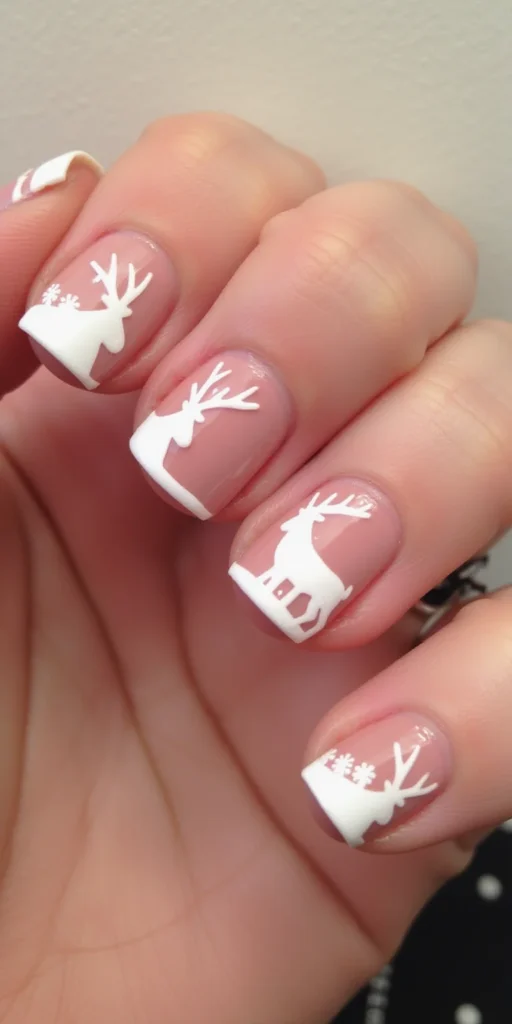
Tiny reindeer silhouettes transform Christmas nails into miniature works of art through precise detailing and careful positioning. Start with a dark base like navy or forest green, then use a fine brush to create simplified reindeer shapes featuring essential elements: oval bodies, thin legs, and delicate branched antlers. Keep proportions small yet instantly recognizable for maximum visual impact.
Position multiple silhouettes facing different directions across your nails for dynamic movement and visual interest. Black polish creates classic drama while metallic shades add luxurious sophistication to the design. Complete with a quality topcoat to ensure your detailed artwork remains flawless throughout the holiday season.
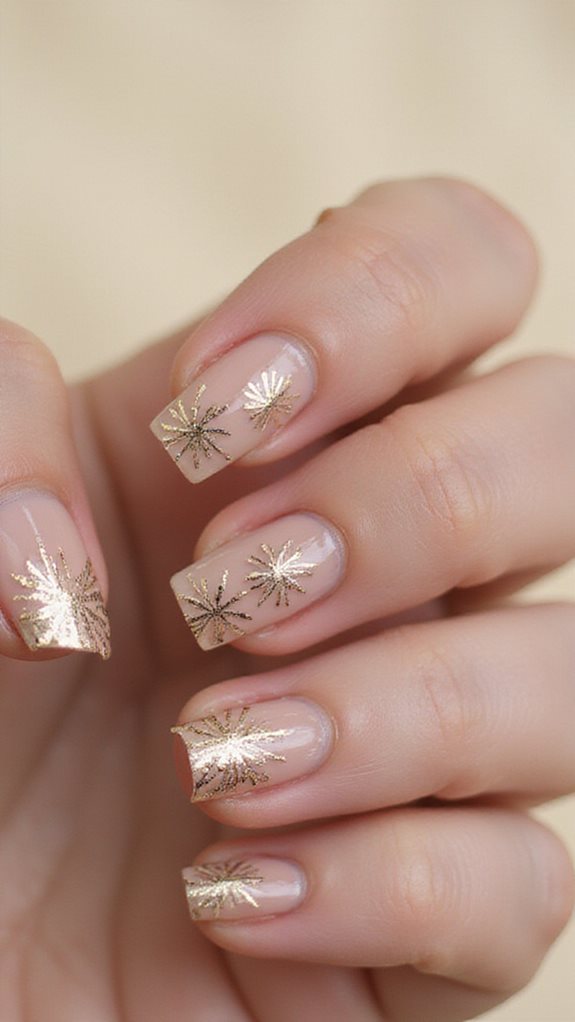
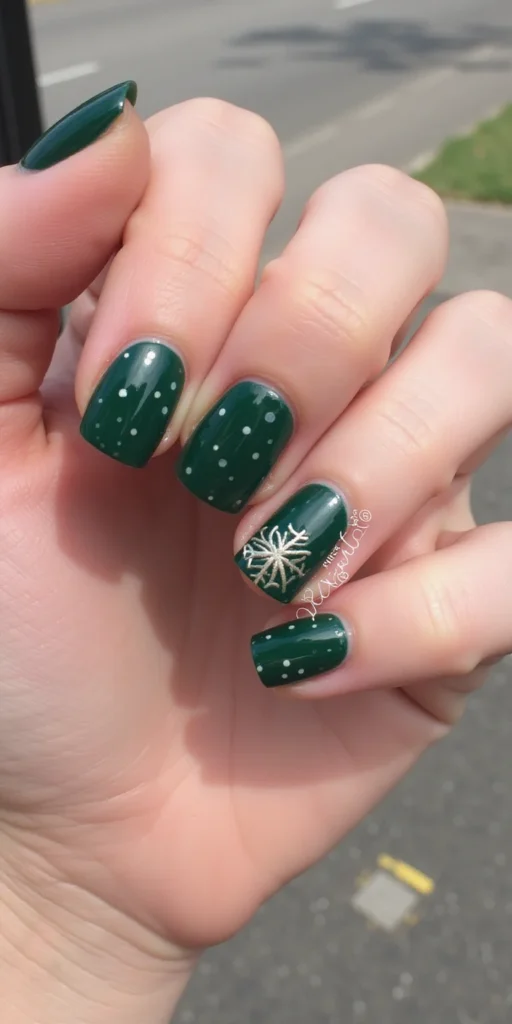
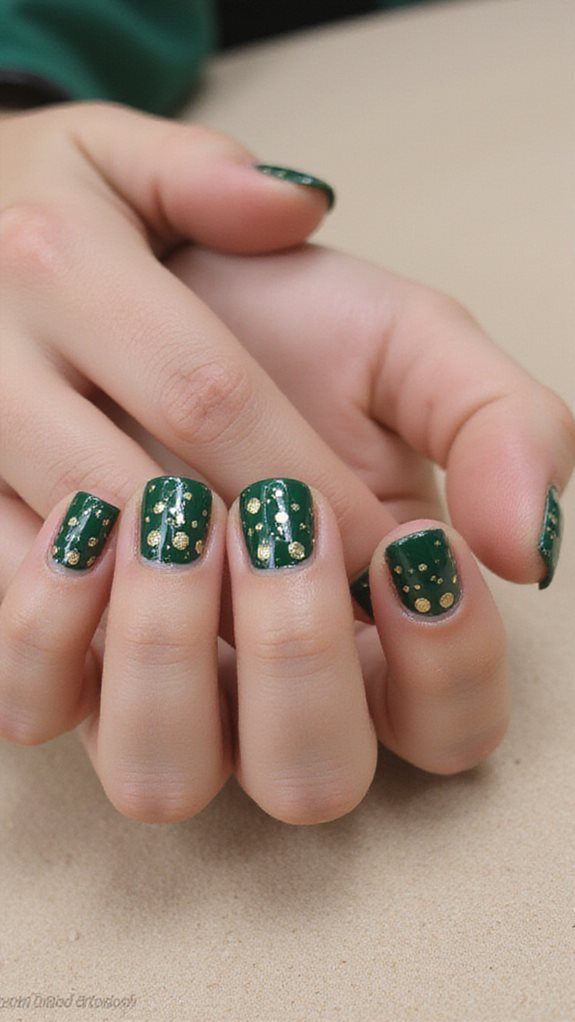
Emerald Green With Silver Stars
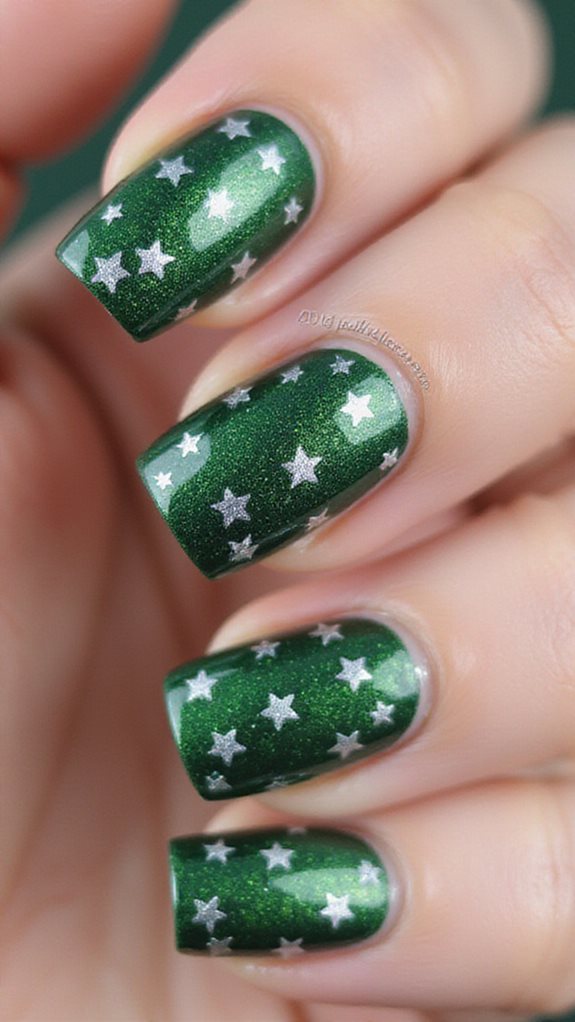
Emerald green polish creates a sophisticated foundation for delicate silver star accents that embody festive elegance. Apply two coats of emerald base color for complete coverage, allowing each layer to dry thoroughly before adding decorative elements.
Use fine-tip brushes or dotting tools to create scattered five-pointed stars across each nail surface with metallic silver polish. Vary the star sizes from tiny pinpoints to slightly larger focal stars for dynamic visual appeal. Seal the design with a quality top coat to prevent chipping and amplify the metallic shimmer effect.
Cranberry Red Matte Finish
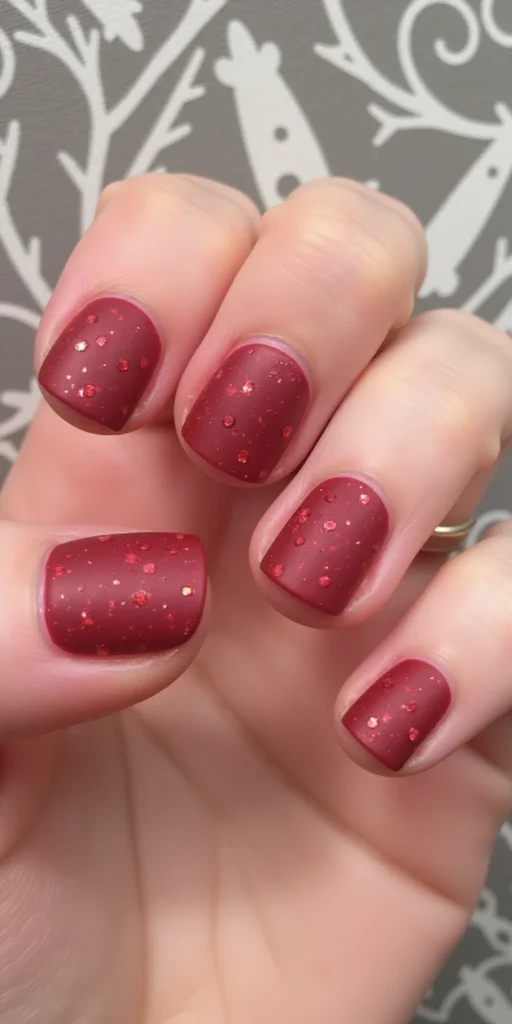
Cranberry red with a matte finish creates an elegant, sophisticated look that’s perfect for holiday celebrations. The rich, deep color provides excellent coverage while the matte topcoat eliminates shine for a modern, minimalist appearance. This combination offers a cozy, inviting aesthetic that works beautifully for intimate gatherings.
The matte finish requires precise application techniques to achieve optimal results. Apply two thin coats of cranberry red polish, allowing each layer to cure completely before adding the specialized matte topcoat. This versatile style complements various nail lengths and shapes while demonstrating professional-level nail artistry.
White Snow-Kissed Tips
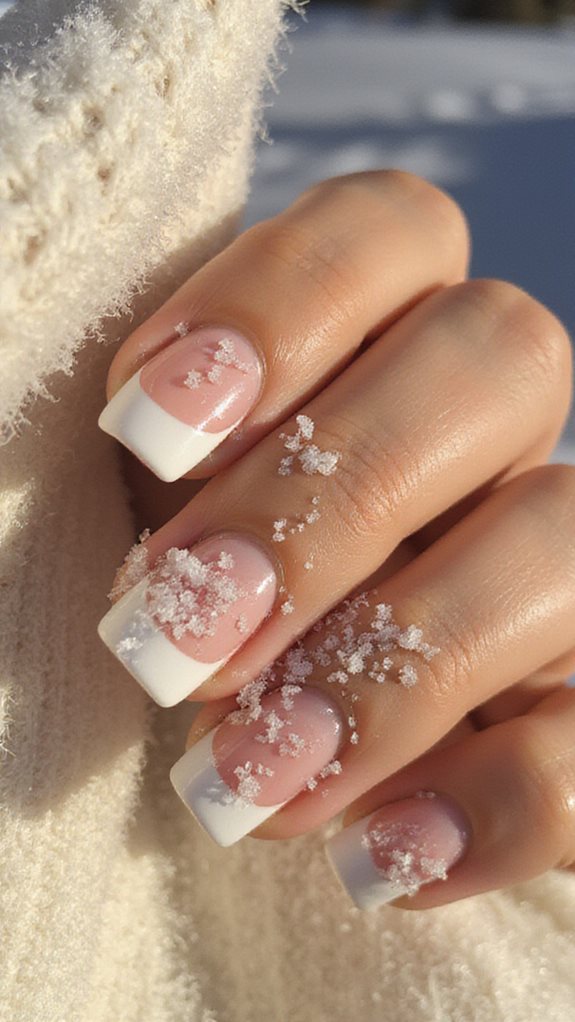
White snow-kissed tips offer a sophisticated twist on the classic French manicure, perfect for capturing winter’s elegant beauty. Start with a nude or clear base coat for complete coverage, then create precise white tips using steady horizontal brush strokes across each nail’s free edge. Add a shimmering crystal accent at the smile line junction to enhance the winter appeal.
Create delicate icy snowflake patterns using a fine detail brush and white polish, applying tiny dots in geometric formations and connecting them with thin lines to form crystalline shapes. Seal the entire design with a high-gloss topcoat while ensuring proper edge protection. This technique delivers professional-grade results that maintain timeless elegance while perfectly embracing seasonal winter themes.
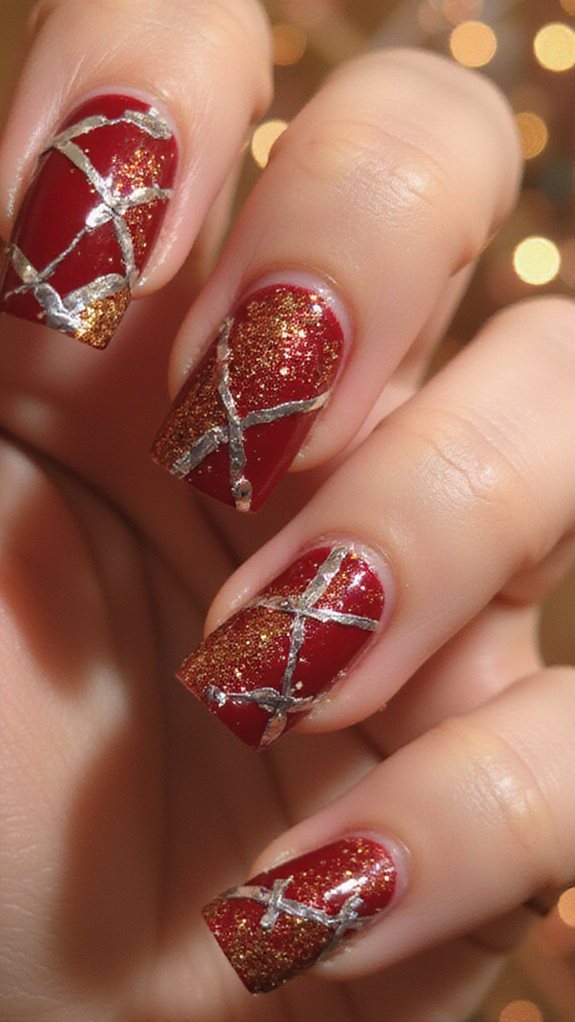
Christmas Plaid Pattern

Christmas plaid patterns bring timeless holiday elegance to nail art through carefully crafted intersecting lines in festive colors. The classic combination of deep emerald green, rich burgundy, and crisp white or gold creates sophisticated seasonal designs that capture the essence of traditional tartan patterns.
Creating perfect plaid requires strategic layering of vertical and horizontal lines with varying thicknesses to achieve authentic dimensional texture. Start with thin, even base color application, then add precision-brushed vertical lines followed by perpendicular horizontal strokes that overlap at intersections. Finish with a high-gloss topcoat to seal the design and ensure long-lasting wear.
Rose Gold Ornament Details
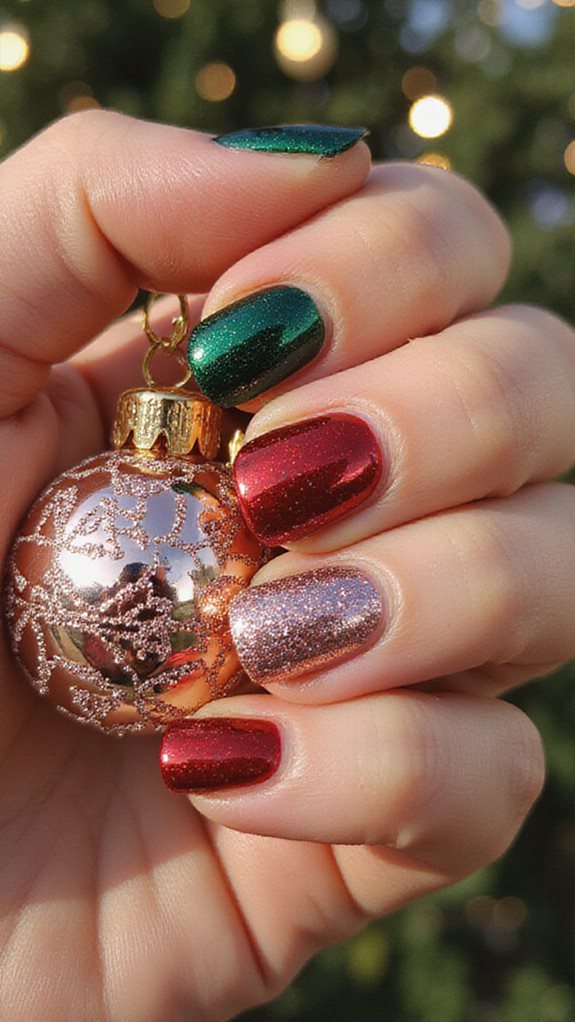
Rose gold ornament details create stunning holiday nail art through strategic metallic placement and layering techniques. Begin with a base coat and Christmas-themed color, then use a fine detail brush to form ornament circles with rose gold polish. Complete the ornament caps by dotting metallic accents with a toothpick for authentic dimensional details.
Layer rose gold glitter within the ornament shapes to enhance depth and visual impact. Connect ornaments to the cuticle area using delicate hanging strings created with a striping brush. Finish with a high-gloss topcoat to preserve the metallic shine and ensure design longevity throughout the festive season.
Deep Forest Green Base
Deep forest green provides the perfect foundation for sophisticated Christmas nail designs that complement metallic accents beautifully. Apply a quality base coat followed by two thin layers of deep forest green polish, allowing each coat to dry completely between applications. This rich shade creates elegant muted tones that work exceptionally well with rose gold details.
The deep forest green creates striking contrast against metallic accents while maintaining a refined aesthetic essential for short Christmas nails. You can develop a sophisticated monochrome design by varying the green intensity across different nails or incorporating subtle texture variations. Seal your base with a high-gloss topcoat before adding any decorative elements for professional results.
Sparkly Christmas Lights Design
Transform your deep forest green base into a dazzling Christmas lights display by applying small dots of white gel polish using a fine detail brush along irregular lines across each nail. While the white base remains tacky, carefully place holographic microglitter onto each dot using tweezers for precise application.
Add yellow and red gel polish dots adjacent to white ones, creating authentic light bulb colors. Seal the design with a thin connecting line using black gel polish to simulate the electrical cord. The holographic particles create authentic shimmering lights that catch ambient light beautifully. Complete the look by adding tiny rhinestones as twinkling ornaments between light clusters for dimensional sparkle.
Burgundy and Gold Marble Effect
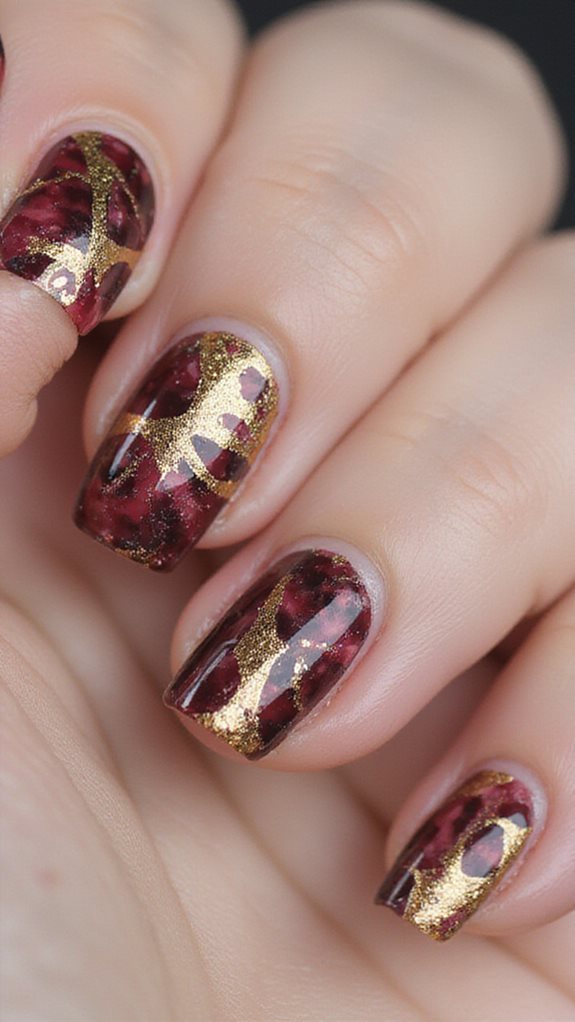
Sophisticated burgundy and gold marble effects deliver elegant Christmas glamour through advanced color blending techniques. Start by applying a burgundy base coat, then drop gold polish onto the wet surface and use a thin brush or toothpick to create swirling motions. Work quickly before polish sets, blending colors without overmixing to achieve authentic marble patterns.
The metallic ombre effect emerges when you gradually fade gold concentration from cuticle to tip. Add negative space detailing by strategically leaving small areas untouched, creating organic marble veining. Seal with high-gloss topcoat to enhance metallic depth and complete the luxurious finish.
Mini Present Box Art
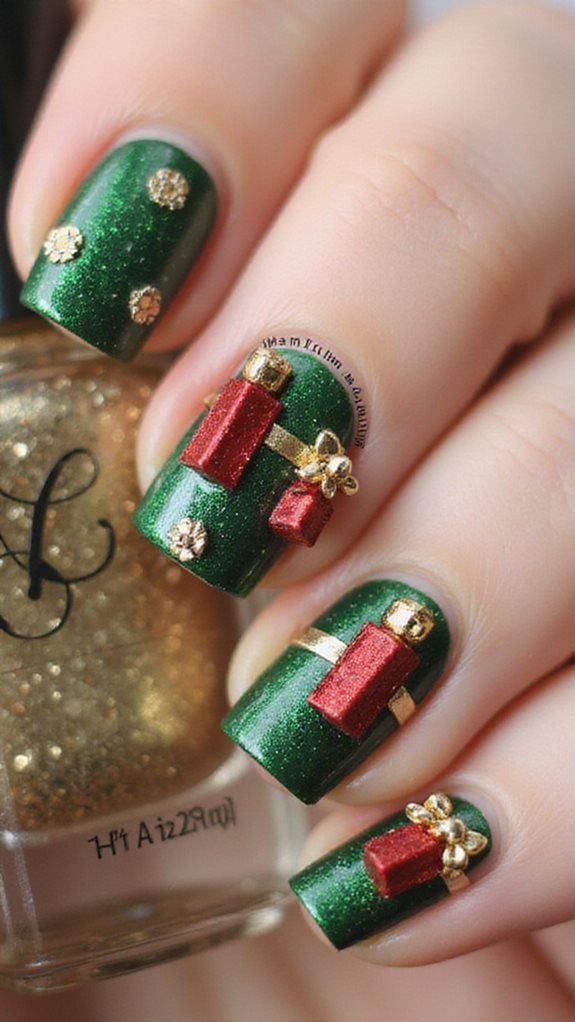
Mini present box nail art creates charming holiday designs by transforming each nail into a tiny wrapped gift. Begin with a base coat in festive colors like emerald green, ruby red, or midnight blue, then use striping tape to create clean rectangular sections.
Apply contrasting polish within the designated areas to establish the gift box structure. Add ribbon details using a thin brush to paint intersecting vertical and horizontal lines with metallic gold or silver polish at the nail’s center. Create dimensional bows by forming two small triangular shapes where the ribbon lines meet.
Finish with white polish highlights on the bow edges to add realistic shadows and depth for a professional mini present box effect.
Silver Tinsel Texture
Shimmering silver tinsel texture creates stunning holiday nail art that catches light beautifully with every gesture. Apply a clear base coat, then press fine silver tinsel strands onto the wet polish while working from cuticle to tip. Use gentle pressure to secure the strands without disrupting their placement.
Seal the design with two thin topcoat layers, allowing each to dry completely between applications. This prevents lifting while preserving the dimensional texture that makes nails sparkle. Adjust tinsel density from subtle shimmer to full coverage for dramatic holiday statements.
Christmas Cookie Inspired Nails
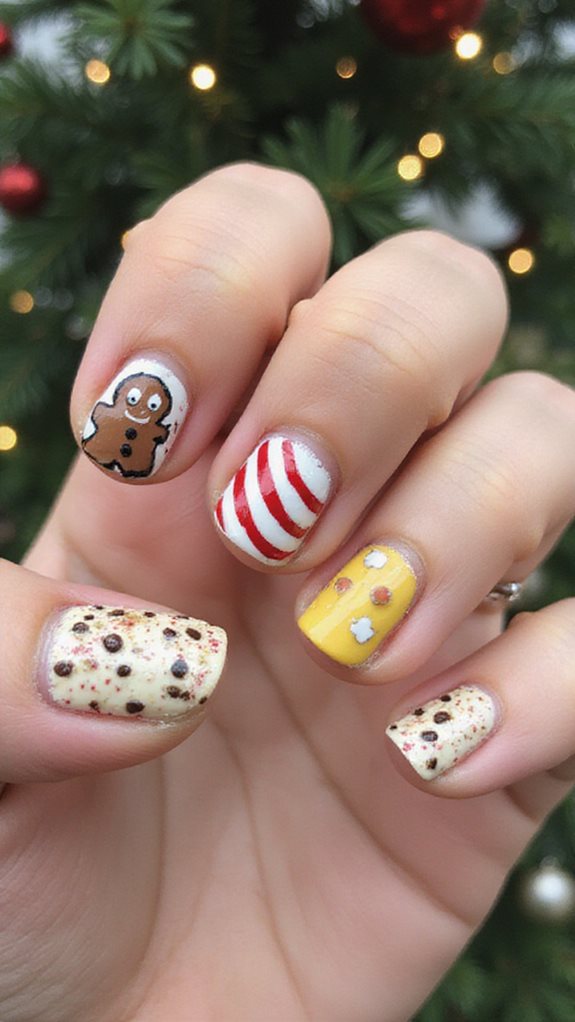
Christmas cookie-inspired nail art brings the cozy warmth of holiday baking to your fingertips through clever color and texture techniques. Start with a nude or cream base coat to mimic sugar cookie dough, then use stippling motions with translucent brown polish to create realistic baked edges. Apply white polish in zigzag patterns using a detail brush to achieve that perfect royal icing effect.
Transform your manicure into miniature confectionery displays by adding textural elements like matte topcoat for an authentic cookie finish. Position small rhinestones strategically as decorative sprinkles or candy pearls, and create dimensional frosting swirls using thick white gel polish with dotting tools. Complete the look with festive sugar cookie decals featuring gingerbread men or star designs for an irresistibly sweet holiday aesthetic.
Festive Polka Dot Pattern
Polka dot patterns bring timeless elegance to Christmas nail art through precise geometric placement and strategic color coordination. Create these charming designs using dotting tools or bobby pins to achieve consistent circle formation across each nail surface.
Start with a base coat in festive colors like deep emerald, classic red, or burgundy, then apply contrasting dots systematically once dry. Space dots evenly while maintaining uniform sizing through consistent tool pressure, choosing combinations like metallic gold and pearl white on dark bases or silver and deep blue on ivory backgrounds. Execute dots in straight lines or scattered formations depending on your preferred aesthetic, allowing each layer to dry completely before applying topcoat.
Champagne Shimmer Holiday Look
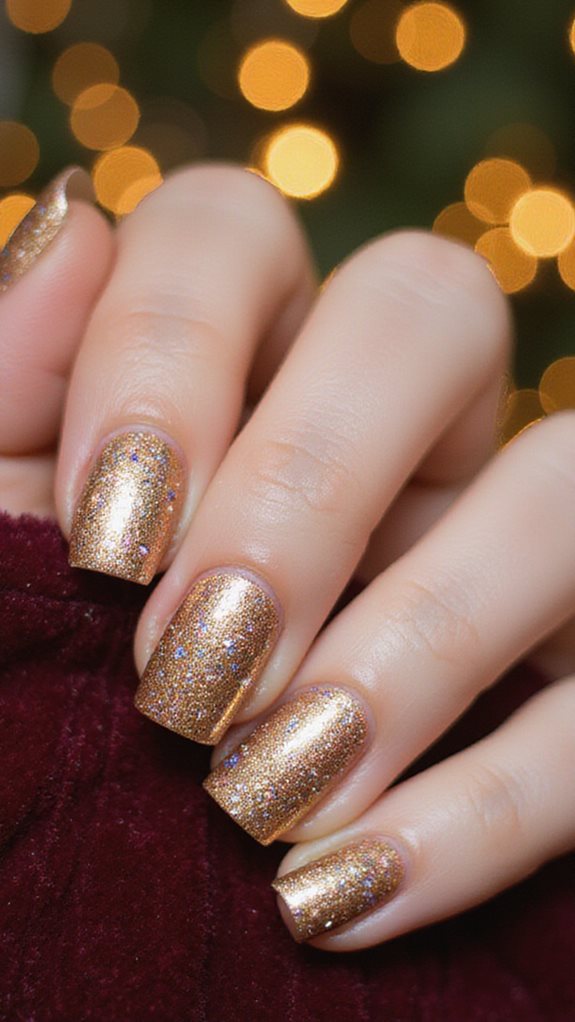
Champagne shimmer nails offer sophisticated holiday elegance through layered metallic application and strategic light reflection. Begin with a nude base coat, then apply
Nutcracker Suite Color Palette
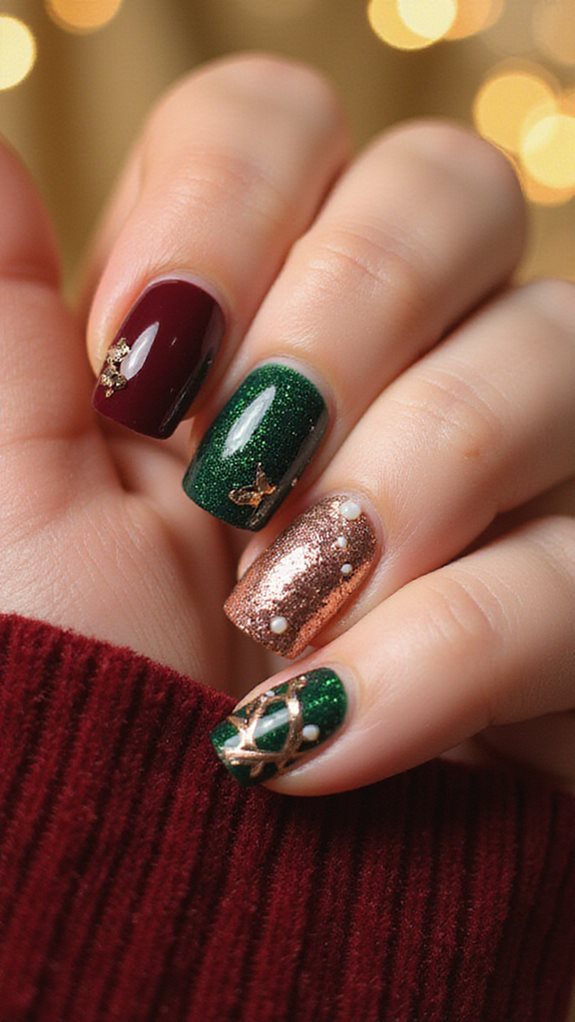
Drawing inspiration from Tchaikovsky’s beloved ballet, the Nutcracker Suite color palette translates theatrical elegance into precise nail artistry. Deep burgundies, rich golds, and classic ballet pink tones create a sophisticated combination that captures the magic of the holiday performance. This festive design brings together warm metallics and traditional ballet colors for a refined seasonal look.
Execute the base application using burgundy polish on your thumb and ring finger while applying ballet pink to your index and middle fingers. Create an ombre effect by blending burgundy into gold at the cuticle line using a makeup sponge with gentle overlapping motions. Complete the design with metallic candy cane stripes using fine brushes and gold polish, drawing diagonal lines across pink bases before sealing with topcoat.
Vintage Christmas Postcard Theme
Vintage Christmas postcard nail art captures the romantic charm of early 20th-century holiday imagery through carefully chosen muted color palettes. Create authentic sepia-toned winter scenes using cream whites, dusty roses, and antique browns applied over ivory base coats. Layer translucent glazes to achieve the aged patina effect that defines vintage postcard aesthetics.
Paint miniature Victorian houses complete with smoking chimneys using fine detail brushes, adding tiny orange-red flame dots inside windows for cozy fireplace ambiance. Execute snow-covered pine trees with vertical dragging motions using white gel polish, then incorporate nostalgic typography elements like “Season’s Greetings” in old-fashioned script fonts. Complete the vintage look with a matte topcoat that eliminates modern shine, transforming your nails into authentic holiday postcard masterpieces.
New Year’s Eve Countdown Design
Ring in the new year with sophisticated countdown nail designs that capture midnight’s celebratory essence through strategic metallic applications and precise geometric patterns. Create elegant countdown accents by applying gold foil numbers sequentially across each nail, positioning “12,” “11,” “10” using precise placement techniques. Execute sparkling champagne touches through strategic glitter gradient application, concentrating density toward cuticle areas while maintaining clean edges.
Begin with black or deep navy base coats for optimal metallic contrast and apply countdown numbers using transfer foils or vinyl stencils, ensuring consistent spacing and alignment. Layer champagne-toned micro-glitter using stippling motions, building coverage gradually before sealing designs with high-gloss topcoat for durability and enhanced reflectivity. Complete accent nails with clock face motifs using fine detailing brushes and metallic polish for cohesive New Year’s Eve theming.
Frequently Asked Questions
How Long Should Christmas Nails Be to Be Considered “Short”?
You’ll achieve ideal nail length for short Christmas nails at 2-4mm beyond your fingertip. This optimal nail length provides sufficient surface area for festive designs while maintaining practical functionality and professional appearance standards.
What Nail Shapes Work Best for Short Christmas Nail Designs?
You’ll achieve optimal nail shape versatility with square, round, or oval cuts for short lengths. These geometric forms provide ideal canvases for festive color combinations, ensuring clean application lines and preventing chipping during intricate holiday design execution.
How Long Do Christmas Nail Designs Typically Last?
Christmas nail designs last 7-14 days depending on nail longevity factors. You’ll maximize nail polish durability by applying base coat, using quality polish, sealing with topcoat, and avoiding excessive water exposure during application process.
Can I Create Christmas Nail Art at Home Without Professional Tools?
You’ll achieve professional results using easy holiday nail polish and DIY christmas nail stickers. Apply base coat, polish, position stickers precisely, seal with topcoat. This systematic approach eliminates complex tools while maintaining salon-quality finish.
What’s the Best Base Coat for Short Christmas Nails?
You’ll need a ridge-filling base coat for optimal nail polish application on short nails. Apply thin, even strokes from cuticle to tip. Choose formulas with strengthening proteins for nail strengthening tips that prevent chipping during festive wear.
Finally
You’ll achieve professional holiday nail artistry by selecting your preferred design from these nine festive options. Apply base coat first, then execute your chosen technique using appropriate tools and pigments. Layer colors systematically, allowing proper drying time between applications.
Seal with topcoat for longevity. Practice precise brush control for intricate details like snowflakes and reindeer silhouettes. Maintain steady hand positioning throughout application. These short-length designs accommodate active lifestyles while delivering sophisticated seasonal aesthetics.